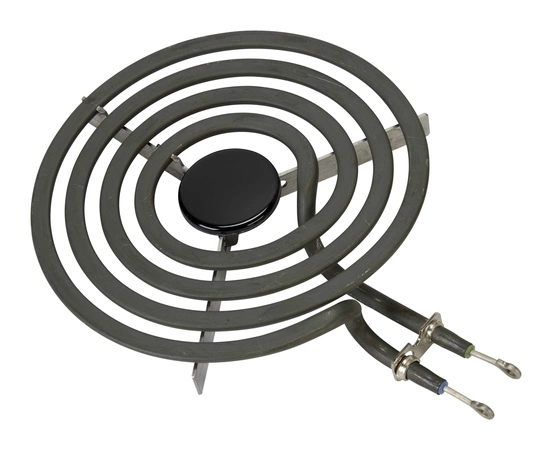
WP660532 Whirlpool Oven Surface Element

The Electric Range Coil Surface Element is a 4-turn, 6" D, 1500-W plug-in style heating element. If the surface burner of your appliance no longer heats up, you may be able to alleviate the issue by replacing this part. Replacing this part will require basic hand tools, some disassembly of the appliance and novice repair experience. You must unplug the appliance or shut off the house circuit breaker before installing this part. Recommended Items: If the element's terminals are corroded, you can replace them with the Element Receptacle and Wire Kit (item 330031). If more than one of your appliance’s elements are no longer working, consider purchasing the complete Coil Surface Element Kit (item 4392061). If needed, the matching 6" element (item WP660532) is also sold separately. If the stainless-steel Burner Drip Bowls of your appliance are discolored or dented, you can replace them with item W10278125.
Part Specification
• This product is a Factory Certified Part. These three words represent quality parts and accessories designed specifically for your appliance. Time tested engineering that meets our strict quality specifications
• This product is a replacement part
• Package contains (1) Electric Range Coil Surface Element
• No tools required for installation
Weight : 0.94 lbs
Package Dimension : 9.13 x 7.01 x 2.05
Product Details
Reviews
Replaces Parts
Installation Instructions
Compatible Models
Compatible Brands
The Electric Range Coil Surface Element is a 4-turn, 6" D, 1500-W plug-in style heating element. If the surface burner of your appliance no longer heats up, you may be able to alleviate the issue by replacing this part. Replacing this part will require basic hand tools, some disassembly of the appliance and novice repair experience. You must unplug the appliance or shut off the house circuit breaker before installing this part. Recommended Items: If the element's terminals are corroded, you can replace them with the Element Receptacle and Wire Kit (item 330031). If more than one of your appliance’s elements are no longer working, consider purchasing the complete Coil Surface Element Kit (item 4392061). If needed, the matching 6" element (item WP660532) is also sold separately. If the stainless-steel Burner Drip Bowls of your appliance are discolored or dented, you can replace them with item W10278125.
Part Specification
• This product is a Factory Certified Part. These three words represent quality parts and accessories designed specifically for your appliance. Time tested engineering that meets our strict quality specifications
• This product is a replacement part
• Package contains (1) Electric Range Coil Surface Element
• No tools required for installation
Part Specification
• This product is a Factory Certified Part. These three words represent quality parts and accessories designed specifically for your appliance. Time tested engineering that meets our strict quality specifications
• This product is a replacement part
• Package contains (1) Electric Range Coil Surface Element
• No tools required for installation
Weight : 0.94 lbs
Package Dimension : 9.13 x 7.01 x 2.05
Please Verify Your Purchase to Submit a Review
Step 1: Before beginning the replacement process, shut off the breaker switch to the stove, or unplug it from the wall outlet.
Step 2: Carefully pull the range away from the wall, making sure not to snag any cords on the way out.
Step 3: Locate the two screws on the back of the stove that hold the cooking surface in place. Unscrew the screws and carefully remove the cooking surface.
Step 4: Once the cooking surface is removed, locate the WP660532 whirlpool surface element. The element should be located directly behind the cooking surface.
Step 5: Disconnect the wires from the old element and then remove it.
Step 6: Install the new surface element by connecting the wires to the terminals. Make sure all connections are secure and tight.
Step 7: Slide the cooking surface back into place and securely tighten the screws on the back of the stove.
Step 8: Plug the range back into the wall outlet or turn the breaker switch back on.
Step 9: Turn the heat up on the cooking surface and check for proper functioning. Once you’ve confirmed that the element is working properly, your installation is complete.
Please keep in mind, these instructions are for general guidance and should always be used in conjunction with the manufacturer's manual, if available.


