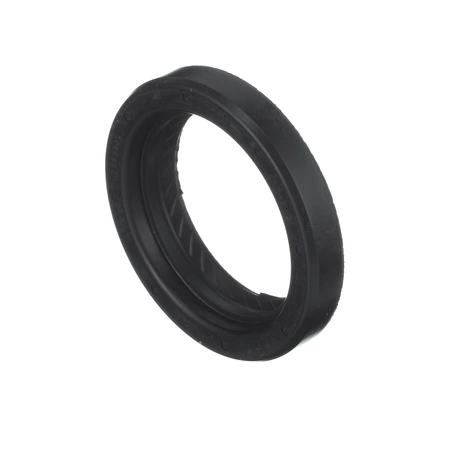
WP3349985 Whirlpool Shaft Seal

Whirlpool WP3349985 SEAL-COVER . We're your #1 source for genuine OEM appliance parts. Contact us for further questions as well as any other appliance parts needs!
Weight : 0.01 lbs
Package Dimension : 1.75 x 0.75 x 0.25
Product Details
Reviews
Replaces Parts
Installation Instructions
Compatible Models
Compatible Brands
Whirlpool WP3349985 SEAL-COVER . We're your #1 source for genuine OEM appliance parts. Contact us for further questions as well as any other appliance parts needs!
Weight : 0.01 lbs
Package Dimension : 1.75 x 0.75 x 0.25
Please Verify Your Purchase to Submit a Review
The following parts are replaced by this product
- 3349985
- 3347188
- 62787
DIY Instructions for Replacing the Whirlpool WP3349985 Seal-Cover
Replacing the Whirlpool WP3349985 seal-cover is a challenging but rewarding repair job. However, once you complete the task correctly, it will keep your appliance looking great and protect it from further damage. With this DIY guide, you'll be able to quickly and easily replace your seal-cover.
What You’ll Need:
• A Phillips head screwdriver
• An adjustable wrench
• New replacement seal cover (Whirlpool WP3349985)
• Some light machine oil
• A clean cloth
Instructions:
1. Unplug your dishwasher and locate the screws that hold the main outer panel in place. Carefully remove all these screws using a Phillips head screwdriver, then set them aside for later use.
2. Once the screws have been removed, you will be able to access the old seal-cover. Using an adjustable wrench, carefully remove the screws and brackets that hold the old seal-cover in place.
3. Now, take your new replacement seal-cover (Whirlpool WP3349985) and position it over the opening. The new seal should sit flush against the outer panel of the dishwasher.
4. Use the screws and brackets that you removed to hold the new seal-cover in place. Reattach the screws securely, but not too tightly.
5. Now, to ensure that the seal-cover works properly, lightly coat the surface with some light machine oil. This will help reduce friction in the cover and ensure it functions smoothly.
6. Finally, wipe down the entire area with a clean cloth to remove any excess oil or dirt.
And there you have it—you’ve successfully replaced the Whirlpool WP3349985 seal-cover! We hope this DIY guide has been helpful and that you can now enjoy your newly replaced seal-cover. Good luck!
Please keep in mind, these instructions are for general guidance and should always be used in conjunction with the manufacturer's manual, if available.


