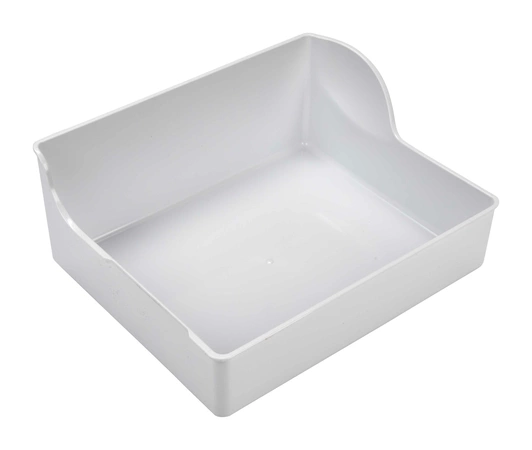
WP67001255 Whirlpool Ice Bucket

The Refrigerator Ice Bucket is a white plastic bin for use in side-by-side refrigerators. This bucket is located under the ice maker and stores ice cubes in the freezer section of your appliance. If your current ice bucket is missing or cracked, replacing this part may alleviate the issue. Bucket measures approximately 15-1/2"L x 13"W x 7"H. Installing this part will require no disassembly of the unit or repair experience.
Part Specification
• This product is a Factory Certified Part. These three words represent quality parts and accessories designed specifically for your appliance. Time tested engineering that meets our strict quality specifications
• This product is a replacement part
• Package contains (1) Refrigerator Ice Bucket
• No tools required for installation
Weight : 9.82 lbs
Package Dimension : 15.44 x 12.94 x 7.13
Product Details
Reviews
Replaces Parts
Installation Instructions
Compatible Models
Compatible Brands
The Refrigerator Ice Bucket is a white plastic bin for use in side-by-side refrigerators. This bucket is located under the ice maker and stores ice cubes in the freezer section of your appliance. If your current ice bucket is missing or cracked, replacing this part may alleviate the issue. Bucket measures approximately 15-1/2"L x 13"W x 7"H. Installing this part will require no disassembly of the unit or repair experience.
Part Specification
• This product is a Factory Certified Part. These three words represent quality parts and accessories designed specifically for your appliance. Time tested engineering that meets our strict quality specifications
• This product is a replacement part
• Package contains (1) Refrigerator Ice Bucket
• No tools required for installation
Part Specification
• This product is a Factory Certified Part. These three words represent quality parts and accessories designed specifically for your appliance. Time tested engineering that meets our strict quality specifications
• This product is a replacement part
• Package contains (1) Refrigerator Ice Bucket
• No tools required for installation
Weight : 9.82 lbs
Package Dimension : 15.44 x 12.94 x 7.13
Please Verify Your Purchase to Submit a Review
Please note: We use this information only to confirm your purchase, it won’t be published.
The following parts are replaced by this product
- D7621116
- D7621123
- 10476207
- 68346-1
- D76211-22
- D7621106
- D7621107
- D7621122
- 10476201
- 10476202
- 10476203
- 69919-1
- 67001255
- 8170926
- 8170399
DIY Instructions for Replacing a Whirlpool WP67001255 PAN-ICE MAKER
Replacing a Whirlpool WP67001255 PAN-ICE MAKER does not require any specialized tools or parts. You can do it yourself in just a few easy steps.
Step 1: Gather Your Tools
â— Phillips head screwdriver
â— Flathead screwdriver
â— 10mm socket wrench
Step 2: Preparing the Work Area
â— Unplug the ice maker from the wall socket and turn off the water supply.
â— Empty the contents of the bin.
Step 3: Removing the Ice Maker
â— Remove the screws located on the back of the unit with a Phillips head screwdriver.
â— Carefully lift the unit out of the freezer.
Step 4: Installing the New Ice Maker
â— Align the new ice maker into the opening and secure with the screws.
â— Connect the power cord to an outlet and turn the power on.
Step 5: Finishing Touches
â— Turn the water supply back on and check for any leaks.
â— Run the test cycle to make sure the machine is working properly.
Congratulations! You have successfully replaced your Whirlpool WP67001255 PAN-ICE MAKER.
Please keep in mind, these instructions are for general guidance and should always be used in conjunction with the manufacturer's manual, if available.


