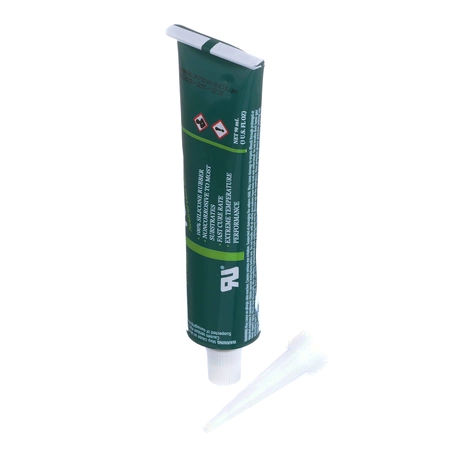
D511637P Speed Queen Washer Dryer Adhesive Dow 737 Clear, 3 Oz Tube

Ensure your laundry appliances perform at their best with this premium adhesive, designed specifically for Speed Queen washers and dryers. This 3 oz tube of clear Dow 737 adhesive offers superior bonding strength, making it ideal for repairing and securing components in your Speed Queen, Amana, or Alliance appliances. Its high-quality formulation provides water and heat resistance, ensuring lasting durability under varying conditions.
Easy to apply and set, this adhesive is perfect for both professional technicians and DIY enthusiasts. Whether you're maintaining equipment or performing repairs, having the right adhesive on hand is essential for efficient appliance operation. Invest in this must-have accessory to keep your washer and dryer running smoothly and extend their lifespan.
Product Details
Reviews
Replaces Parts
Installation Instructions
Compatible Models
Compatible Brands
Ensure your laundry appliances perform at their best with this premium adhesive, designed specifically for Speed Queen washers and dryers. This 3 oz tube of clear Dow 737 adhesive offers superior bonding strength, making it ideal for repairing and securing components in your Speed Queen, Amana, or Alliance appliances. Its high-quality formulation provides water and heat resistance, ensuring lasting durability under varying conditions.
Easy to apply and set, this adhesive is perfect for both professional technicians and DIY enthusiasts. Whether you're maintaining equipment or performing repairs, having the right adhesive on hand is essential for efficient appliance operation. Invest in this must-have accessory to keep your washer and dryer running smoothly and extend their lifespan.
Please Verify Your Purchase to Submit a Review
The following parts are replaced by this product
- 511637
- 511637P
DIY Steps for Replacing the D511637P Speed Queen Washer/Dryer Adhesive
1. Start by turning off the power to your washer/dryer combo unit. This can be done by unplugging the appliance from the wall. For safety reasons, it is important that you verify that the power is off by testing the unit.
2. Open up the unit and locate the D511637P Speed Queen Washer/Dryer adhesive. To do this, you will need to unscrew the screws or bolts that hold the outer panels in place.
3. Using a flat head screwdriver, carefully pry off the perimeter of the panel to release the adhesive from the washer/dryer. Discard the old adhesive.
4. Clean the surface of the washer/dryer where the adhesive was previously located. This can be done with a damp cloth.
5. Apply the new adhesive such as Dow 737 Clr 3 OZ Tube. It is important to apply the adhesive around the perimeter of the washer/dryer. Make sure to spread the adhesive evenly along the edges.
6. Replace the panels on the washer/dryer, making sure that the adhesive is secure. Use the screws or bolts to secure the panels in place.
7. Restore power to the washer/dryer. Test the unit to ensure that it is functioning properly.
Please keep in mind, these instructions are for general guidance and should always be used in conjunction with the manufacturer's manual, if available.


