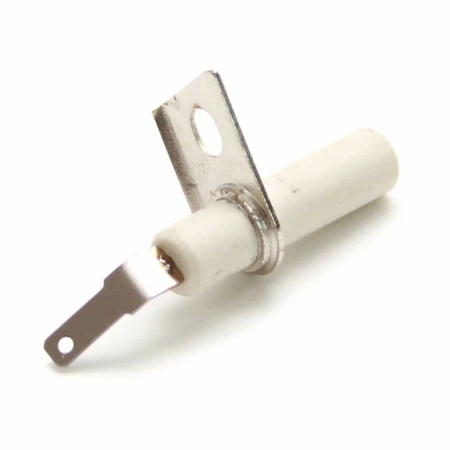
316011200 Frigidaire Oven Top Burner Igniter

Ensure your cooking runs smoothly with this high-quality igniter, designed specifically for various oven models. This reliable replacement part is compatible with popular brands like Crosley, Electrolux, Frigidaire, Gibson, Kelvinator, Kenmore, Tappan, and Westinghouse. Crafted by Electrolux, it meets stringent performance standards, ensuring consistent ignition for effortless heating.
Whether you’re troubleshooting a malfunctioning burner or performing routine maintenance, this igniter is a vital component that enhances your oven's efficiency and reliability. Easy to install, it allows for a hassle-free DIY repair, getting your appliance back in working order in no time. Maintain your oven with this essential part and enjoy perfectly cooked meals every time.
Weight : 0.29 lbs
Package Dimension : 5.94 x 5.00 x 1.34
Product Details
Reviews
Replaces Parts
Installation Instructions
Compatible Models
Compatible Brands
Ensure your cooking runs smoothly with this high-quality igniter, designed specifically for various oven models. This reliable replacement part is compatible with popular brands like Crosley, Electrolux, Frigidaire, Gibson, Kelvinator, Kenmore, Tappan, and Westinghouse. Crafted by Electrolux, it meets stringent performance standards, ensuring consistent ignition for effortless heating.
Whether you’re troubleshooting a malfunctioning burner or performing routine maintenance, this igniter is a vital component that enhances your oven's efficiency and reliability. Easy to install, it allows for a hassle-free DIY repair, getting your appliance back in working order in no time. Maintain your oven with this essential part and enjoy perfectly cooked meals every time.
Weight : 0.29 lbs
Package Dimension : 5.94 x 5.00 x 1.34
Please Verify Your Purchase to Submit a Review
The following parts are replaced by this product
- 5303311262
Step 1: Disconnect the power source to your Frigidaire range. Locate and inspect the igniter on the burner.
Step 2: Carefully remove the screws that secure the burner to the top of the range. Have a container or rag ready to collect any debris that may fall off during the removal process.
Step 3: Gently pull off the burner from the top of the range. Disconnect the wires that are attached to the igniter.
Step 4: Get a new ignition module from your local home improvement store, and install it in place of the old one. Make sure to securely attach it with screws so that it does not become loose.
Step 5: Reattach the wires to the new igniter module. Make sure that each wire is connected, and that none of them are crossed or frayed.
Step 6: Reattach the burner to the top of the range. Make sure that it is securely attached so that it will not move around.
Step 7: Turn on the power source to the range. Test the burner to make sure that it lights up when the knob is turned. Enjoy your newly installed Frigidaire 316011200 IGNITER-TOP BURNER!
Please keep in mind, these instructions are for general guidance and should always be used in conjunction with the manufacturer's manual, if available.


