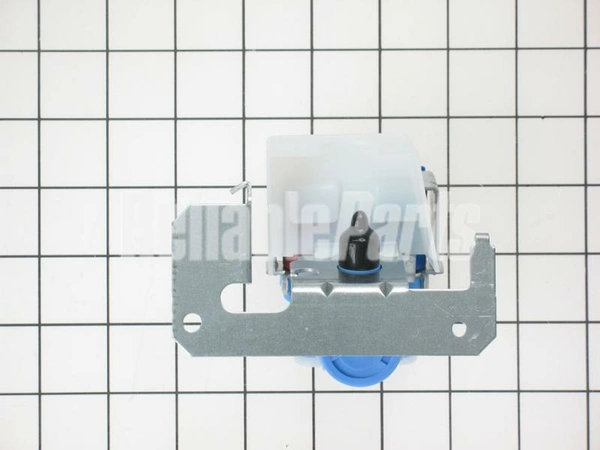
WR57X10051 GE Refrigerator Water Valve Kit

Ensure your refrigerator operates at peak performance with the WR57X10051 water valve kit from GE. This essential part controls the water supply, making it critical for your appliance's ice and water dispenser functions. Designed specifically for compatibility with brands like GE, Hotpoint, Haier, Monogram, and Café, this valve and float assembly offers a reliable solution for a variety of refrigerator models. Crafted for durability and efficiency, installation is straightforward, making DIY repairs hassle-free. By replacing a worn or malfunctioning valve, you can improve water flow and maintain your fridge's overall functionality. Keep your home running smoothly with this quality replacement part.
Weight : 1.55 lbs
Package Dimension : 8.78 x 5.43 x 4.53
Product Details
Reviews
Replaces Parts
Installation Instructions
Compatible Models
Compatible Brands
Ensure your refrigerator operates at peak performance with the WR57X10051 water valve kit from GE. This essential part controls the water supply, making it critical for your appliance's ice and water dispenser functions. Designed specifically for compatibility with brands like GE, Hotpoint, Haier, Monogram, and Café, this valve and float assembly offers a reliable solution for a variety of refrigerator models. Crafted for durability and efficiency, installation is straightforward, making DIY repairs hassle-free. By replacing a worn or malfunctioning valve, you can improve water flow and maintain your fridge's overall functionality. Keep your home running smoothly with this quality replacement part.
Weight : 1.55 lbs
Package Dimension : 8.78 x 5.43 x 4.53
Please Verify Your Purchase to Submit a Review
The following parts are replaced by this product
- WR57X10018
- IMV513
- WR57X104
- WR57X111
- WR57X119
- WR57X98
- WR57X99
- WR57X92
- WR57X0092
- WR57X0098
- WR57X0099
- WR57X0104
- WR57X0111
- WR57X0119
- WR57X10051-25PK
DIY Instructions for Replacing a WR57X10051 GE Water Valve Kit
1. Shut off water to the appliance. Before beginning any repair, make sure the power is off to avoid electric shock and water damage. Locate the shut-off valve and turn it clockwise to close the water supply to the refrigerator.
2. Unplug the appliance. For safety reasons, it's important to unplug any refrigerator before repairing it.
3. Remove the back panel. Using a screwdriver, remove the screws on the back panel of the refrigerator and gently pull it away from the wall.
4. Remove the water valve. The water valve will be connected to the water line with a hose clamp. Use a pair of needle nose pliers or a screwdriver to loosen the clamp and remove the hose.
5. Disconnect the wiring harness. To disconnect the wiring harness, gently pull apart the clips that are holding the wires in place.
6. Install the new water valve. Use a wrench to tighten the mounting bracket into place and connect the water line to the new valve with a hose clamp. Connect the wiring harness to the new valve. Make sure all connections are secure.
7. Test the new water valve. Turn the water supply back on and test the new water valve to make sure it's working.
8. Replace the back panel. Gently push the back panel back into place and use a screwdriver to tighten the screws.
9. Clean up. Clean up any mess you may have made during the installation and make sure all the tools are put away.
Congratulations! You have successfully replaced the WR57X10051 GE Water Valve Kit.
Please keep in mind, these instructions are for general guidance and should always be used in conjunction with the manufacturer's manual, if available.


