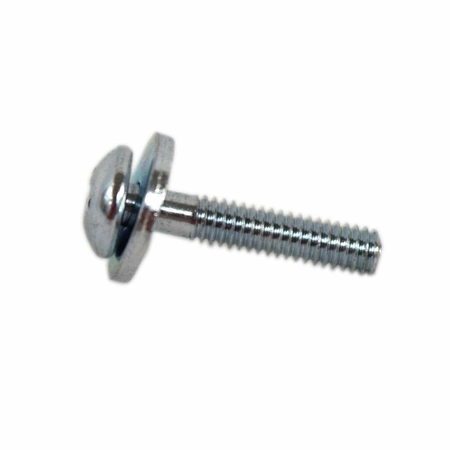
W10831019 Whirlpool Stove Door Screw

Door screw works with some Whirlpool, Jenn-Air, Kenmore, KitchenAid, Maytag, Amana, Magic Chef, Admiral, Norge, and Roper models of stoves / ovens / ranges.
Weight : 0.01 lbs
Package Dimension : 1.00 x 0.50 x 0.25
Door screw works with some Whirlpool, Jenn-Air, Kenmore, KitchenAid, Maytag, Amana, Magic Chef, Admiral, Norge, and Roper models of stoves / ovens / ranges.
Weight : 0.01 lbs
Package Dimension : 1.00 x 0.50 x 0.25
Please Verify Your Purchase to Submit a Review
Replacing the W10831019 Whirlpool Stove Door Screw
1. Power off your Whirlpool oven and unplug it from the wall outlet. Place a cloth or sheet on the floor beneath the stove to avoid damaging any surface with tools or parts.
2. Locate the four screws that secure the door to the oven. Depending on the model, these screws may be at the top of the door near the handle, or at the bottom.
3. Grab a Phillips-head screwdriver and begin to remove the screws. One at a time, turn each screw counterclockwise until it is removed.
4. After all the screws have been removed, carefully lift the door off the oven body. If necessary, use a putty knife or flat head screwdriver to help pry up the lip of the door. Set the door aside in a safe location.
5. Locate the hole where the screw needs to be inserted. Most Whirlpool oven doors have two holes, one near the top and the other near the bottom.
6. Take the new W10831019 screw and insert the unthreaded end into the hole. Be careful not to cross-thread the screw inside the oven door.
7. Use the Phillips-head screwdriver to turn the screw clockwise until you feel it is secured in place.
8. Replace the other three screws in the same manner to secure the door onto the oven body.
9. Plug the oven back into the wall outlet, and turn it back on.
10. Test the oven door to make sure the new screw is secure.
Please keep in mind, these instructions are for general guidance and should always be used in conjunction with the manufacturer's manual, if available.


