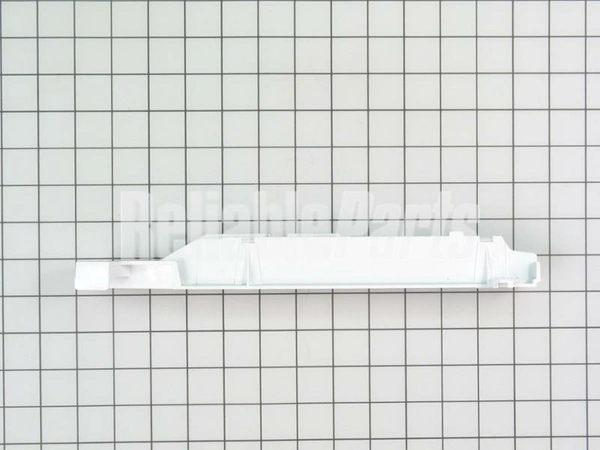
WR72X242 GE Refrigerator Right Hand Slide Assembly

Maintain your refrigerator with the right-hand slide assembly designed for optimal performance and durability. This essential part, compatible with a range of GE brands including Hotpoint, Haier, Monogram, and Café, ensures smooth operation of your refrigerator drawer. Crafted with precision, it provides a seamless fit for a variety of models, helping to Maintain organization and accessibility in your fridge. Whether you're replacing a worn-out component or performing routine maintenance, this slide assembly is an ideal choice for restoring your appliance to its full functionality. Invest in quality parts to extend the life of your refrigerator and maintain its efficiency. Perfect for DIY enthusiasts and professionals alike, this drawer and pan component is easy to install and designed to meet high standards of reliability.
Weight : 1.03 lbs
Package Dimension : 17.00 x 7.00 x 1.20
Product Details
Reviews
Replaces Parts
Installation Instructions
Compatible Models
Compatible Brands
Maintain your refrigerator with the right-hand slide assembly designed for optimal performance and durability. This essential part, compatible with a range of GE brands including Hotpoint, Haier, Monogram, and Café, ensures smooth operation of your refrigerator drawer. Crafted with precision, it provides a seamless fit for a variety of models, helping to Maintain organization and accessibility in your fridge. Whether you're replacing a worn-out component or performing routine maintenance, this slide assembly is an ideal choice for restoring your appliance to its full functionality. Invest in quality parts to extend the life of your refrigerator and maintain its efficiency. Perfect for DIY enthusiasts and professionals alike, this drawer and pan component is easy to install and designed to meet high standards of reliability.
Weight : 1.03 lbs
Package Dimension : 17.00 x 7.00 x 1.20
Please Verify Your Purchase to Submit a Review
Please note: We use this information only to confirm your purchase, it won’t be published.
The following parts are replaced by this product
- WR72X0242
DIY Guide to Replacing the WR72X242 GE Slide Rail Assembly
Are you looking for instructions on how to replace a GE WR72X242 slide rail assembly? Replacing a slide rail in your refrigerator can be challenging, but with the right instructions, you can make it happen! So let's get started! This step-by-step guide will show you exactly how to do the job and keep your refrigerator running like new again.
Step 1: Unplug the refrigerator and remove the shelves. To do this, carefully pull up each shelf's metal clips to release them from their brackets. Then, set the shelves aside.
Step 2: Remove the screws that hold the back cover in place. These are usually located near the top and bottom of the back cover. Gently lift the cover off and set it to the side.
Step 3: Locate the old slide rail assembly. It should be a flat piece of metal with screws lining both the top and bottom.
Step 4: Unscrew the four bolts that secure the rail. Keep the bolts handy for reusing them later.
Step 5: Slide the rail off the refrigerator door. Now you're ready to install the new one!
Step 6: Place the new slide rail assembly into position, ensuring the screws line up with the holes in the door.
Step 7: Secure the rail by screwing the four bolts back.
Step 8: Replace the back cover and reattach the shelves.
Step 9: Plug the refrigerator back in, and you're done!
Please keep in mind, these instructions are for general guidance and should always be used in conjunction with the manufacturer's manual, if available.


