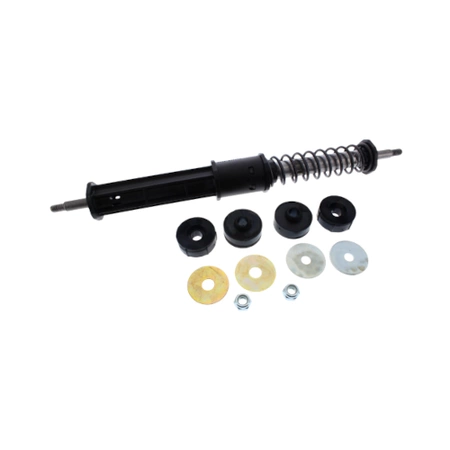
803777P Speed Queen Shock Assembly Kit

This Speed, Queen 803777P KIT SHOCK ASSY kit is the perfect way to upgrade your washing machine. Designed to fit most standard washing machines, this kit will reduce the amount of vibration you experience during a wash cycle.
Weight : 0.38 lbs
Package Dimension : 15.75 x 2.05 x 1.65
Product Details
Reviews
Replaces Parts
Installation Instructions
Compatible Models
Compatible Brands
This Speed, Queen 803777P KIT SHOCK ASSY kit is the perfect way to upgrade your washing machine. Designed to fit most standard washing machines, this kit will reduce the amount of vibration you experience during a wash cycle.
Weight : 0.38 lbs
Package Dimension : 15.75 x 2.05 x 1.65
Please Verify Your Purchase to Submit a Review
The following parts are replaced by this product
- 803777
Step 1: Gather Your Tools
Before you start replacing the Speed Queen 803777P KIT SHOCK ASSY, you’ll need to gather the necessary tools. You will need a Phillips screwdriver, needle nose pliers, and a 1/4 inch flat head screwdriver.
Step 2: Access the Shock Assembly
Open the top of the washer and locate the shock assembly. The shock assembly is situated near the back of the washer and is attached to the frame with three Phillips screws. Use the Phillips screwdriver to remove all three screws and set them aside in a safe place.
Step 3: Remove the Shock Assembly
Once the screws are removed, gently pull the shock assembly away from the frame. The shock assembly should come out easily.
Step 4: Disconnect the Electrical Connection
Using the needle nose pliers, carefully remove the electrical connection from the shock assembly by gently pulling it off.
Step 5: Install the New Shock Assembly
Once the old shock assembly is removed, take the new assembly and place it onto the frame. Secure the assembly in place with the three Phillips screws that were removed earlier.
Step 6: Reconnect the Electrical Connection
Use the needle nose pliers to reconnect the electrical connection to the new shock assembly. Once connected, make sure the connection is secure by gently tugging on the wire to make sure it is not loose.
Step 7: Test the Shock Assembly
Once the Shock Assembly is secured in place and the electrical connection is reconnected, close the lid of the washer and turn on the power. Run a short cycle on the washer and make sure the shock assembly is working properly. If everything seems to be working correctly, then you have successfully replaced your Speed Queen 803777P KIT SHOCK ASSY.
Please keep in mind, these instructions are for general guidance and should always be used in conjunction with the manufacturer's manual, if available.


