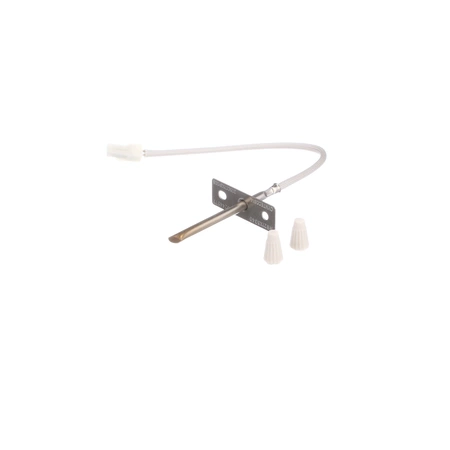
WB23X5340 GE Oven Heat Sensor Probe Assembly

WB23X5340 is an original equipment manufactured (OEM) part. Ensure optimal performance of your oven with the precision-engineered heat sensor probe assembly, designed specifically for select GE appliances. This reliable component accurately measures and regulates oven temperature, enhancing cooking efficiency and consistency. With compatibility across GE, Hotpoint, Haier, Monogram, and Café brands, this part seamlessly integrates into various oven models, providing a straightforward replacement solution.
Constructed for durability and easy installation, this sensor and thermistor assembly helps maintain the perfect cooking environment, reducing the risk of overheating or undercooking. Whether you're replacing a faulty sensor or upgrading to a high-quality component, this assembly is an essential part of your oven maintenance. Achieve delicious results every time with the dependable technology of this heat sensor probe.
Weight : 0.69 lbs
Package Dimension : 7.24 x 6.89 x 1.93
Product Details
Reviews
Replaces Parts
Installation Instructions
Compatible Models
Compatible Brands
WB23X5340 is an original equipment manufactured (OEM) part. Ensure optimal performance of your oven with the precision-engineered heat sensor probe assembly, designed specifically for select GE appliances. This reliable component accurately measures and regulates oven temperature, enhancing cooking efficiency and consistency. With compatibility across GE, Hotpoint, Haier, Monogram, and Café brands, this part seamlessly integrates into various oven models, providing a straightforward replacement solution.
Constructed for durability and easy installation, this sensor and thermistor assembly helps maintain the perfect cooking environment, reducing the risk of overheating or undercooking. Whether you're replacing a faulty sensor or upgrading to a high-quality component, this assembly is an essential part of your oven maintenance. Achieve delicious results every time with the dependable technology of this heat sensor probe.
Weight : 0.69 lbs
Package Dimension : 7.24 x 6.89 x 1.93
Please Verify Your Purchase to Submit a Review
The following parts are replaced by this product
- WB23T10002
- WB20K5035
Replacing the GE Stove Range Oven SENSOR HEAT PROBE ASSEMBLY
DIY Step-by-Step Instructions
1. Turn your oven off and unplug it from the wall.
2. Open the oven door, and locate the heat sensor probe.
3. Gently pull the sensor heat probe out of its socket.
4. Remove the two screws fastening the SENSOR HEAT PROBE ASSEMBLY to the oven.
5. Disconnect the wiring harness from the SENSOR HEAT PROBE ASSEMBLY.
6. Re-connect the wiring harness to the new SENSOR HEAT PROBE ASSEMBLY.
7. Place the new SENSOR HEAT PROBE ASSEMBLY in the socket and secure it with the two screws.
8. Plug the oven back into the wall, and turn it on.
9. Test the oven by setting the desired temperature and check that the oven heat is correct.
You have now successfully replaced the GE Stove Range Oven SENSOR HEAT PROBE ASSEMBLY!
Please keep in mind, these instructions are for general guidance and should always be used in conjunction with the manufacturer's manual, if available.


