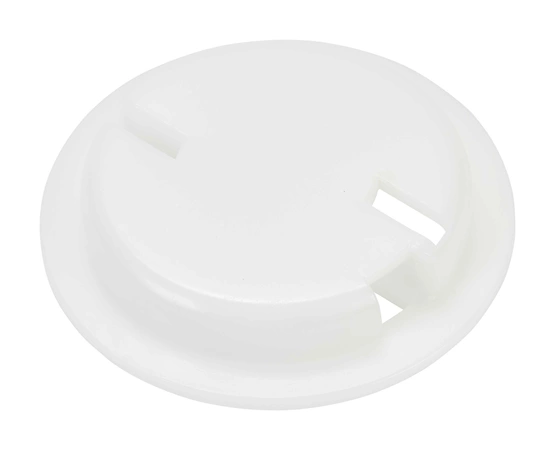
WPD7749401 Whirlpool Drive Gear

This SxS Refrigerator Ice Auger End Cap, White, replaces the cap on the auger in your refrigerator's ice bin. To replace the part, remove the ice bin from the freezer and set it on a suitable work surface. Disassemble the auger from the bin removing any necessary screws and then gently pry the old end cap from the end of the auger with a flat blade screwdriver. Insert the new cap at an angle and and simply snap it into place. Replacing this part will require basic hand tools, some disassembly of the refrigerator and novice repair experience.
Part Specification
• This product is a Factory Certified Part. These three words represent quality parts and accessories designed specifically for your appliance. Time tested engineering that meets our strict quality specifications
• This product is a replacement part
• Package contains (1) SxS Refrigerator Ice Auger End Cap, White
• Tools Needed: Multi screwdriver, putty knife
Weight : 0.12 lbs
Package Dimension : 3.62 x 3.62 x 0.87
Product Details
Reviews
Replaces Parts
Installation Instructions
Compatible Models
Compatible Brands
This SxS Refrigerator Ice Auger End Cap, White, replaces the cap on the auger in your refrigerator's ice bin. To replace the part, remove the ice bin from the freezer and set it on a suitable work surface. Disassemble the auger from the bin removing any necessary screws and then gently pry the old end cap from the end of the auger with a flat blade screwdriver. Insert the new cap at an angle and and simply snap it into place. Replacing this part will require basic hand tools, some disassembly of the refrigerator and novice repair experience.
Part Specification
• This product is a Factory Certified Part. These three words represent quality parts and accessories designed specifically for your appliance. Time tested engineering that meets our strict quality specifications
• This product is a replacement part
• Package contains (1) SxS Refrigerator Ice Auger End Cap, White
• Tools Needed: Multi screwdriver, putty knife
Part Specification
• This product is a Factory Certified Part. These three words represent quality parts and accessories designed specifically for your appliance. Time tested engineering that meets our strict quality specifications
• This product is a replacement part
• Package contains (1) SxS Refrigerator Ice Auger End Cap, White
• Tools Needed: Multi screwdriver, putty knife
Weight : 0.12 lbs
Package Dimension : 3.62 x 3.62 x 0.87
Please Verify Your Purchase to Submit a Review
The following parts are replaced by this product
- D7749401
- 4343893
- D7749401
Replacing the Whirlpool WPD7749401 CAP- HELIX
1. Gather the necessary tools and materials. You will need a Phillips-head screwdriver, needle nose pliers, a replacement Whirlpool WPD7749401 CAP- HELIX, and an adjustable wrench.
2. Disconnect the power source from the appliance. Unplug the electrical cord from the outlet or turn the circuit breaker off at the main panel to make sure the power is disconnected from the appliance.
3. Remove the screws that are holding the CAP- HELIX in place. Use the Phillips-head screwdriver to remove the screws from the mounting bracket and then carefully pull out the CAP- HELIX.
4. Install the replacement CAP- HELIX. Carefully line up the tabs on the new CAP- HELIX with the slots in the mounting bracket and then secure it in place with the Phillips-head screwdriver.
5. Reconnect the power source. Plug the electrical cord back into the outlet or restore power to the circuit breaker at the main panel.
6. Test the CAP- HELIX. Turn on the appliance and ensure that it is functioning properly.
Please keep in mind, these instructions are for general guidance and should always be used in conjunction with the manufacturer's manual, if available.


