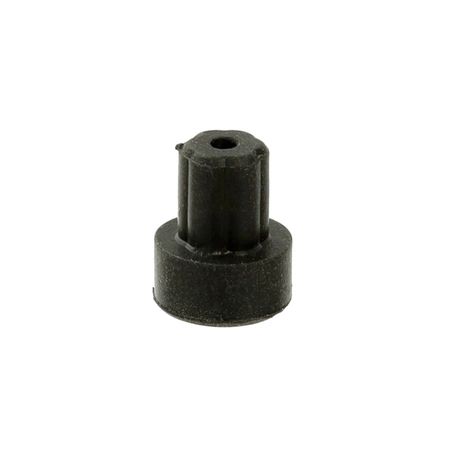
W10919249 Whirlpool Burner Grate Foot

W10919249 is an original equipment manufactured (OEM) part. Enhance the performance of your Whirlpool range with this essential burner grate foot, designed for lasting durability and reliable function. Specifically crafted to replace damaged or worn-out feet, this part ensures your burner grate sits securely, promoting safe and effective cooking. It is compatible with a variety of brands, including Admiral, Amana, Jenn-Air, Kenmore, Kitchenaid, Magic Chef, Maytag, Norge, Roper, and of course, Whirlpool.
Maintain your kitchen appliance with this high-quality leg that meets strict standards for safety and reliability. Whether you're a professional chef or a home cooking enthusiast, maintaining your range with genuine parts is key to optimal performance. Trust in this dependable solution to keep your cooking experience seamless and enjoyable.
Weight : 0.00 lbs
Package Dimension : 1.46 x 0.79 x 0.39
Product Details
Reviews
Replaces Parts
Installation Instructions
Compatible Models
Compatible Brands
W10919249 is an original equipment manufactured (OEM) part. Enhance the performance of your Whirlpool range with this essential burner grate foot, designed for lasting durability and reliable function. Specifically crafted to replace damaged or worn-out feet, this part ensures your burner grate sits securely, promoting safe and effective cooking. It is compatible with a variety of brands, including Admiral, Amana, Jenn-Air, Kenmore, Kitchenaid, Magic Chef, Maytag, Norge, Roper, and of course, Whirlpool.
Maintain your kitchen appliance with this high-quality leg that meets strict standards for safety and reliability. Whether you're a professional chef or a home cooking enthusiast, maintaining your range with genuine parts is key to optimal performance. Trust in this dependable solution to keep your cooking experience seamless and enjoyable.
Weight : 0.00 lbs
Package Dimension : 1.46 x 0.79 x 0.39
Please Verify Your Purchase to Submit a Review
The following parts are replaced by this product
- 74007356
- W10465081
- WP74007356
Replacing the Whirlpool W10919249 BUMPER
DIY Instructions
1. Unplug your Whirlpool washer from the electrical outlet or turn off power from the circuit breaker.
2. Tip your washer back to access the bottom of the machine.
3. Slide out the lower access panel and locate the bumper on the corner of the washer bearing plate.
4. Remove the screws that secure the bumper in place using a Phillips head screwdriver.
5. Take the old bumper off.
6. Place the new bumper into the same holes as the old one and secure it with the screws you removed.
7. Slide the access panel back into place and tip the washer back to its upright position.
8. Plug in your washer or turn the power back on from the circuit breaker.
9. Test the washer to ensure the bumper is securely attached.
Tips:
• Avoid using too much force when removing the screws. If they are stuck, try applying some light lubricant.
• Make sure the new bumper is properly aligned before securing it with the screws.
Please keep in mind, these instructions are for general guidance and should always be used in conjunction with the manufacturer's manual, if available.


