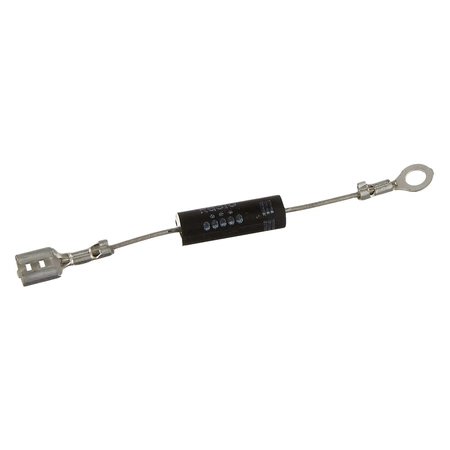
W11256462 Whirlpool Microwave Diode

W11256462 is an original equipment manufactured (OEM) part. Enhance the performance of your microwave with this high-quality diode designed specifically for Whirlpool appliances. This essential component plays a crucial role in the microwave's operation by regulating the flow of electricity, ensuring efficient heating and cooking.
Compatible with numerous brands including Admiral, Amana, Jenn-Air, Kenmore, Kitchenaid, Magic Chef, Maytag, Norge, and Roper, this diode is a versatile choice for various microwave models. Made to meet rigorous standards, it ensures durability and reliable performance.
Whether you're repairing an existing unit or conducting regular maintenance, integrating this diode guarantees that your appliance operates at its best. Easy to install and highly effective, it's a smart choice for DIY enthusiasts and professionals alike. Trust in the quality and compatibility of this essential microwave part.
Weight : 0.025000 lbs
Dimension : 4.015700 x 1.377900 x 0.629900
Product Details
Reviews
Replaces Parts
Installation Instructions
Compatible Models
Compatible Brands
W11256462 is an original equipment manufactured (OEM) part. Enhance the performance of your microwave with this high-quality diode designed specifically for Whirlpool appliances. This essential component plays a crucial role in the microwave's operation by regulating the flow of electricity, ensuring efficient heating and cooking.
Compatible with numerous brands including Admiral, Amana, Jenn-Air, Kenmore, Kitchenaid, Magic Chef, Maytag, Norge, and Roper, this diode is a versatile choice for various microwave models. Made to meet rigorous standards, it ensures durability and reliable performance.
Whether you're repairing an existing unit or conducting regular maintenance, integrating this diode guarantees that your appliance operates at its best. Easy to install and highly effective, it's a smart choice for DIY enthusiasts and professionals alike. Trust in the quality and compatibility of this essential microwave part.
Weight : 0.025000 lbs
Dimension : 4.015700 x 1.377900 x 0.629900
Write Your Own Review
The following parts are replaced by this product
- 4393600
- 8184664
- 8205361
- W10163432
- W10245187
- W10492276
- W10492278
- W10575765
- WPW10492276
- WPW10575765
- W10886077
DIY Guide to Replacing the Whirlpool W11256462 DIODE
Replacing a Whirlpool W11256462 diode is a relatively simple task. This guide will provide step-by-step instructions on how to successfully replace the diode in your appliance.
Step 1: Unplug the Appliance: Before beginning any repair, make sure to unplug the appliance from any power source. This is to ensure the safety of anyone involved in the repair.
Step 2: Remove the Cover: Carefully remove the cover of the appliance to gain access to the diode.
Step 3: Identify the Diode: Identify the diode that needs to be replaced. It should be labeled with the Whirlpool W11256462 part number.
Step 4: Disconnect the Old Diode: Once the diode has been identified, use a pair of needle-nose pliers to carefully disconnect the diode from the circuit board.
Step 5: Install the New Diode: Place the new diode in the same location as the old one and carefully reconnect it to the circuit board.
Step 6: Test the Appliance: Once the new diode has been installed and reconnected, test the appliance to make sure it is working properly.
Step 7: Replace the Cover: Finally, replace the appliance’s cover and plug it back into its power source.
You have successfully replaced the Whirlpool W11256462 diode in your appliance. Now you can enjoy using it in your home!
Please keep in mind, these instructions are for general guidance and should always be used in conjunction with the manufacturer's manual, if available.


