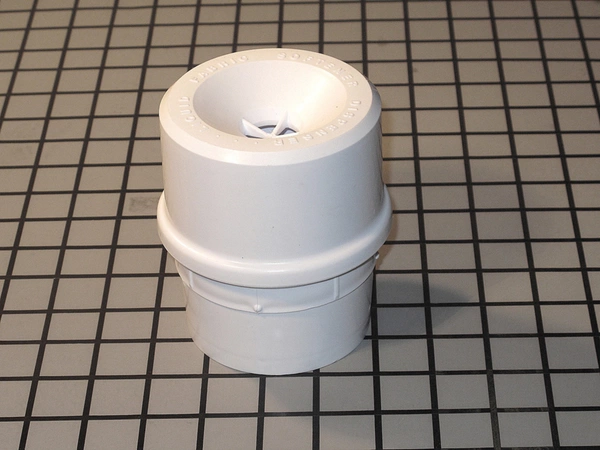
W10864899 Whirlpool Fabric Softener Dispenser

W10864899 Whirlpool Fabric Softener Dispenser
Weight : 0.58 lbs
Package Dimension : 4.00 x 4.00 x 5.00
Product Details
Reviews
Replaces Parts
Installation Instructions
Compatible Models
Compatible Brands
W10864899 Whirlpool Fabric Softener Dispenser
Weight : 0.58 lbs
Package Dimension : 4.00 x 4.00 x 5.00
Please Verify Your Purchase to Submit a Review
The following parts are replaced by this product
- 3350834
- 26000
- WP3350834
Replace Your Whirlpool W10864899 DISPENSER: A Step-by-Step DIY Guide
If the dispenser on your Whirlpool W10864899 dishwasher needs replacement, you can save time and money by doing it yourself. This easy-to-follow guide will help you get it done in no time.
Materials Needed:
-New Whirlpool W10864899 Dispenser
-Socket wrench or Phillips head screwdriver
-Flathead screwdriver
-Pliers
Step 1: Unplug the dishwasher from the wall outlet for safety reasons. You don’t want to risk electric shock while removing the old dispenser.
Step 2: Pull out the dishwasher tray and remove each of the screws holding the upper panel in place. Then, carefully pull the panel away from the dishwasher to reveal the dispenser underneath.
Step 3: Use a flathead screwdriver to disconnect the water line from the back of the dispenser. Secure the line with a clamp so it doesn’t leak while you’re working.
Step 4: With a socket wrench or Phillips head screwdriver, loosen the two screws securing the dispenser to the dishwasher door. If the screws are too tight, you may need to use pliers to remove them.
Step 5: Pull the old dispenser out of the dishwasher and discard it.
Step 6: Place the new Whirlpool W10864899 dispenser into the dishwasher and secure it with the screws you removed.
Step 7: Reconnect the water line to the back of the dispenser using the flathead screwdriver. Make sure the connection is tight so there are no leaks.
Step 8: Test the dispenser by running a cycle. Make sure the detergent is properly dispensed before proceeding.
Step 9: Reattach the upper panel of the dishwasher and replace the screws you removed earlier.
Step 10: Plug the dishwasher back into the wall outlet and turn it on. Your Whirlpool W10864899 dishwasher should now be functioning properly with its new dispenser!
Please keep in mind, these instructions are for general guidance and should always be used in conjunction with the manufacturer's manual, if available.


