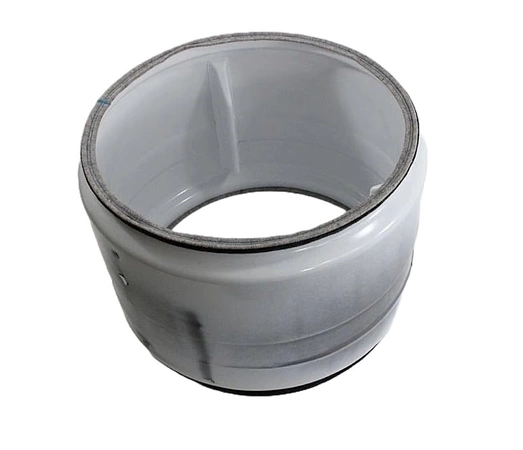
W10518375 Whirlpool Drum Assembly

Maintain your washing machine with this high-quality drum assembly designed to ensure optimal performance and longevity. This essential component is compatible with various brands, including Admiral, Amana, Jenn-Air, Kenmore, Kitchenaid, Magic Chef, Maytag, Norge, Roper, and Whirlpool, making it a versatile choice for many washer models. Crafted by Whirlpool, a trusted leader in home appliances, this drum and tub assembly guarantees a perfect fit and reliable function. Whether you're experiencing excessive noise, vibrations, or wear, replacing your drum can significantly Maintain your washing machine's efficiency. Invest in this durable drum assembly to maintain your appliance's functionality and achieve cleaner laundry results with every cycle.
Weight : 139.21 lbs
Package Dimension : 30.00 x 30.00 x 21.50
Product Details
Reviews
Replaces Parts
Installation Instructions
Compatible Models
Compatible Brands
Maintain your washing machine with this high-quality drum assembly designed to ensure optimal performance and longevity. This essential component is compatible with various brands, including Admiral, Amana, Jenn-Air, Kenmore, Kitchenaid, Magic Chef, Maytag, Norge, Roper, and Whirlpool, making it a versatile choice for many washer models. Crafted by Whirlpool, a trusted leader in home appliances, this drum and tub assembly guarantees a perfect fit and reliable function. Whether you're experiencing excessive noise, vibrations, or wear, replacing your drum can significantly Maintain your washing machine's efficiency. Invest in this durable drum assembly to maintain your appliance's functionality and achieve cleaner laundry results with every cycle.
Weight : 139.21 lbs
Package Dimension : 30.00 x 30.00 x 21.50
Please Verify Your Purchase to Submit a Review
The following parts are replaced by this product
- 3389448
Replacing the Whirlpool W10518375 Drum Support Roller
1. Unplug the washing machine's power cord from the electrical outlet. Place a towel at the front of the appliance to catch any water that may be present.
2. Locate the four screws that secure the top panel to the frame. Remove the screws with a Phillips-head screwdriver. Carefully lift the top panel away from the frame and set it aside.
3. Find the two mounting screws on either side of the drum support roller. Use a Phillips-head screwdriver to remove the screws.
4. Pull the old drum support roller away from the frame. Take care not to lose any parts that may have been secured in the support roller.
5. Insert the new Whirlpool W10518375 Drum Support Roller into the frame. Secure the roller with the two mounting screws.
6. Lower the top panel onto the frame and replace the four screws. Tighten them securely with the Phillips-head screwdriver.
7. Plug the power cord back into the electrical outlet and turn on the machine. Test the washing machine to ensure that the new roller is functioning properly.
Please keep in mind, these instructions are for general guidance and should always be used in conjunction with the manufacturer's manual, if available.


