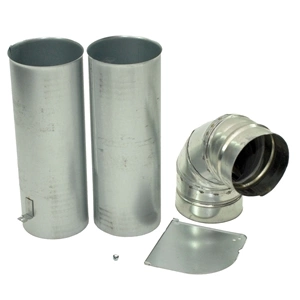
3911EZ9131X LG Dryer Stainless Steel Side Venting Kit

Maximize your dryer’s efficiency with this stainless steel side venting kit designed specifically for LG dryers. Constructed from high-quality materials, this durable venting solution ensures optimal airflow, reducing the risk of lint build-up and enhancing drying performance. Its sleek stainless steel finish adds a modern touch while providing protection against wear and tear.
Compatible exclusively with LG brands, this venting kit allows for flexible installation options, making it easy to adapt to your laundry space. Whether you’re replacing an old duct or upgrading your system, this part simplifies venting and helps improve your appliance's energy efficiency. Keep your dryer running smoothly and effectively with this essential accessory, designed to meet all your venting needs.
Weight : 6.42 lbs
Package Dimension : 11.50 x 5.55 x 13.98
Product Details
Reviews
Replaces Parts
Installation Instructions
Compatible Models
Compatible Brands
Maximize your dryer’s efficiency with this stainless steel side venting kit designed specifically for LG dryers. Constructed from high-quality materials, this durable venting solution ensures optimal airflow, reducing the risk of lint build-up and enhancing drying performance. Its sleek stainless steel finish adds a modern touch while providing protection against wear and tear.
Compatible exclusively with LG brands, this venting kit allows for flexible installation options, making it easy to adapt to your laundry space. Whether you’re replacing an old duct or upgrading your system, this part simplifies venting and helps improve your appliance's energy efficiency. Keep your dryer running smoothly and effectively with this essential accessory, designed to meet all your venting needs.
Weight : 6.42 lbs
Package Dimension : 11.50 x 5.55 x 13.98
Please Verify Your Purchase to Submit a Review
The following parts are replaced by this product
- 383EEL9001B
DIY: Replacing a 3911EZ9131X LG Dryer Side Venting Kit - Stainless Steel
1. Gather the tools and replacement parts you will need, including: a Phillips head screwdriver, pliers, an adjustable wrench, a vent kit that is compatible with your LG dryer model, replacement screws, and Allen wrench.
2. Unplug the power cord from the wall outlet.
3. Open the top of the dryer and locate the existing venting kit.
4. Disconnect the venting kit by using the adjustable wrench to remove the clamps that secure the venting hose. Then, unscrew the screws that attach the venting kit to the back of the wall.
5. Remove the old venting kit and discard it.
6. Inspect the wall/floor area where the venting kit was previously installed and clean any debris or dust before installing the new venting kit.
7. Position the new venting kit in the same location as the old one and secure it to the back of the dryer wall with the included screws.
8. Reattach the vent hose to the new venting kit by using the adjustable wrench. Secure the clamps to ensure the vent hose doesn’t come loose.
9. Plug the power cord back into the wall outlet and test your dryer to make sure it is working properly.
10. Congratulations – you have successfully replaced the 3911EZ9131X LG Dryer Side Venting Kit - Stainless Steel!
Please keep in mind, these instructions are for general guidance and should always be used in conjunction with the manufacturer's manual, if available.


