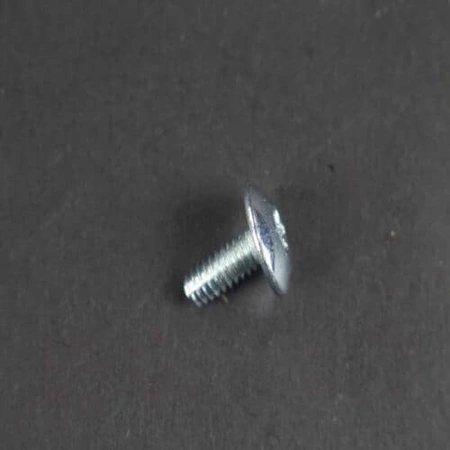
WE2M163 GE Washer Screw

Ensure your washing machine operates at peak performance with this essential fastener from a trusted brand. Designed specifically for a range of appliances, this durable screw is compatible with GE, Hotpoint, Haier, Monogram, and Café washers. Whether you're performing maintenance or repairs, using the correct part is crucial for longevity and reliability. This product is not just a replacement; it’s a commitment to quality, engineered for effortless installation. Elevate your appliance's performance and maintain its efficiency with this high-quality washer screw that meets stringent standards. Count on it to keep your laundry routine running smoothly. Don’t compromise on quality—choose the right part for your washing machine today.
Weight : 0.13 lbs
Package Dimension : 6.00 x 6.00 x 0.50
Product Details
Reviews
Replaces Parts
Installation Instructions
Compatible Models
Compatible Brands
Ensure your washing machine operates at peak performance with this essential fastener from a trusted brand. Designed specifically for a range of appliances, this durable screw is compatible with GE, Hotpoint, Haier, Monogram, and Café washers. Whether you're performing maintenance or repairs, using the correct part is crucial for longevity and reliability. This product is not just a replacement; it’s a commitment to quality, engineered for effortless installation. Elevate your appliance's performance and maintain its efficiency with this high-quality washer screw that meets stringent standards. Count on it to keep your laundry routine running smoothly. Don’t compromise on quality—choose the right part for your washing machine today.
Weight : 0.13 lbs
Package Dimension : 6.00 x 6.00 x 0.50
Please Verify Your Purchase to Submit a Review
The following parts are replaced by this product
- WE02M0163
DIY Guide: How to Replace a GE WE2M163 Screw
Replacing a damaged or worn-out screw on your GE appliance is a straightforward and cost-effective task. This guide will walk you through the steps to replace a GE WE2M163 screw.
Step 1: Gather the Correct Tools and Materials
To replace your GE WE2M163 screw, you'll need the following supplies:
• Flat head screwdriver
• New GE WE2M163 screw
Step 2: Remove the Old Screw
Using your flat head screwdriver, carefully remove the old GE WE2M163 screw by unscrewing it in a counterclockwise direction.
Step 3: Insert the New Screw
Next, insert the new GE WE2M163 screw and tighten in a clockwise direction with your flat head screwdriver.
Step 4: Test the Screw
Finally, test the new screw to ensure it is properly secured.
Congratulations – you've successfully replaced your GE WE2M163 screw! For more helpful DIY guides, visit [YOUR WEBSITE URL].
Please keep in mind, these instructions are for general guidance and should always be used in conjunction with the manufacturer's manual, if available.


