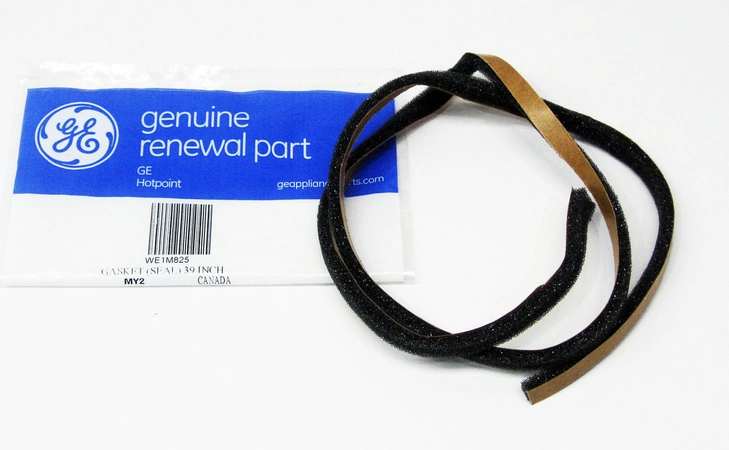
WE1M825 GE Washer 39 Inch Dryer Gasket Seal

Ensure the longevity and efficiency of your GE washer with this high-quality gasket and seal. Designed to effectively prevent leaks and maintain optimal performance, this durable component is compatible with various brands, including GE, Hotpoint, Haier, Monogram, and Café. Measuring 39 inches, it provides a reliable fit, ensuring a secure seal around the door of your appliance. This essential part not only helps to reduce water wastage but also minimizes the risk of mold and mildew buildup, contributing to a cleaner washing environment. Maintain your appliance’s functionality with this dependable gasket and seal, an ideal choice for maintaining your washer's performance and enhancing its overall lifespan.
Weight : 0.26 lbs
Package Dimension : 6.69 x 2.32 x 2.28
Product Details
Reviews
Replaces Parts
Installation Instructions
Compatible Models
Compatible Brands
Ensure the longevity and efficiency of your GE washer with this high-quality gasket and seal. Designed to effectively prevent leaks and maintain optimal performance, this durable component is compatible with various brands, including GE, Hotpoint, Haier, Monogram, and Café. Measuring 39 inches, it provides a reliable fit, ensuring a secure seal around the door of your appliance. This essential part not only helps to reduce water wastage but also minimizes the risk of mold and mildew buildup, contributing to a cleaner washing environment. Maintain your appliance’s functionality with this dependable gasket and seal, an ideal choice for maintaining your washer's performance and enhancing its overall lifespan.
Weight : 0.26 lbs
Package Dimension : 6.69 x 2.32 x 2.28
Please Verify Your Purchase to Submit a Review
The following parts are replaced by this product
- WE1M376
- WE01X10217
- WE00M169
- WE01M0376
DIY Guide to Replace a WE1M825 GE Dryer Gasket (Seal) 39 Inch
Replacing the gasket on your GE dryer is a relatively simple task that can be completed in less than half an hour. Follow these steps to ensure a successful replacement of the WE1M825 GE Dryer Gasket (Seal).
Step 1: Unplug the dryer from the wall socket and make sure it's not connected to any power sources.
Step 2: Carefully move the dryer away from the wall and turn it over so that the bottom panel is accessible.
Step 3: Remove the lower panel by unscrewing the screws on the dryer's back using a Phillips head screwdriver.
Step 4: Use a socket wrench to remove the screws connecting the lint screen and housing to the dryer's back wall.
Step 5: Pull the lint screen and housing away to expose the gasket.
Step 6: Inspect the gasket for any signs of damage or wear, then pull it away from the dryer.
Step 7: Place the new gasket in its place and secure it with the screws you removed in Step 4.
Step 8: Replace the lint screen and housing and use the socket wrench to secure them.
Step 9: Replace the bottom panel and secure it with the screws from Step 3.
Step 10: Plug the dryer back into the wall socket and test it for proper operation.
Congratulations, you have successfully replaced the WE1M825 GE Dryer Gasket (Seal) 39 Inch!
Please keep in mind, these instructions are for general guidance and should always be used in conjunction with the manufacturer's manual, if available.


