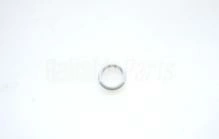
WE1M461 GE Washer O-Ring

Ensure optimal performance for your washing machine with this high-quality O-ring from GE. Specifically designed to create a reliable seal, it helps prevent leaks, maintaining the efficiency of your appliance. Crafted to fit a range of brands including GE, Hotpoint, Haier, Monogram, and Café, this part is essential for keeping your washer running smoothly.
Constructed from durable materials, this gasket offers long-lasting reliability, ensuring that your laundry routines stay uninterrupted. Installation is straightforward, making it an excellent choice for DIY repairs. Maintain your washer's performance with this dependable O-ring and enjoy peace of mind knowing you have a trusted part protecting your investment. Keep your appliances in peak condition for years to come.
Weight : 0.05 lbs
Package Dimension : 3.27 x 2.48 x 0.87
Product Details
Reviews
Replaces Parts
Installation Instructions
Compatible Models
Compatible Brands
Ensure optimal performance for your washing machine with this high-quality O-ring from GE. Specifically designed to create a reliable seal, it helps prevent leaks, maintaining the efficiency of your appliance. Crafted to fit a range of brands including GE, Hotpoint, Haier, Monogram, and Café, this part is essential for keeping your washer running smoothly.
Constructed from durable materials, this gasket offers long-lasting reliability, ensuring that your laundry routines stay uninterrupted. Installation is straightforward, making it an excellent choice for DIY repairs. Maintain your washer's performance with this dependable O-ring and enjoy peace of mind knowing you have a trusted part protecting your investment. Keep your appliances in peak condition for years to come.
Weight : 0.05 lbs
Package Dimension : 3.27 x 2.48 x 0.87
Please Verify Your Purchase to Submit a Review
The following parts are replaced by this product
- WE01M0461
1. Turn off the power to the dryer and unplug it from the wall.
2. Carefully remove the top and front panels of the dryer for access to the drum.
3. Locate the WE1M461 GE O-Ring on the lower side of the drum.
4. Remove the old O-Ring, noting how it was installed.
5. Clean the area around the O-Ring with a cloth, mild soap, and water.
6. Dry the area completely before installing the new O-Ring.
7. Install the new O-Ring as the old one was installed.
8. Reassemble the top and front panels of the dryer.
9. Plug the dryer back in and restore power.
Please keep in mind, these instructions are for general guidance and should always be used in conjunction with the manufacturer's manual, if available.


