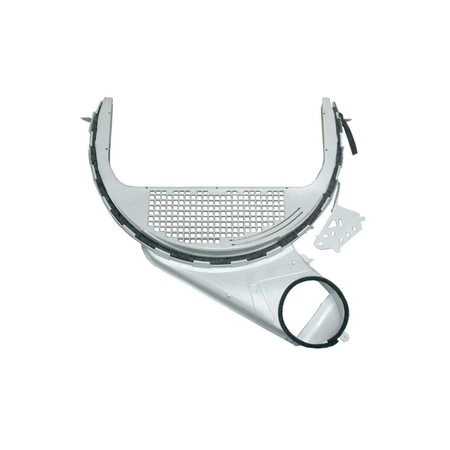
WE14X25080 GE Dryer Lint Filter Trap Assembly

WE14X25080 is an original equipment manufactured (OEM) part. Ensure your dryer operates at peak efficiency with the WE14X25080 lint filter trap assembly from GE. Designed for seamless compatibility with GE, Hotpoint, Haier, Monogram, and Café appliances, this essential component helps prevent lint buildup, enhancing airflow and reducing fire hazards. Crafted from high-quality materials, it promises durability and reliability, making it a wise investment for any dryer maintenance.
This assembly is easy to install, ensuring you can restore your dryer’s performance quickly and with minimal hassle. Ideal for homeowners who prioritize safety and efficiency, the WE14X25080 is a crucial addition to your dryer parts toolkit. Keep laundry day smooth and worry-free by upgrading to this effective lint filter trap assembly today.
Weight : 35.65 lbs
Package Dimension : 28.39 x 26.89 x 7.87
Product Details
Reviews 2
Replaces Parts
Installation Instructions
Compatible Models
Compatible Brands
WE14X25080 is an original equipment manufactured (OEM) part. Ensure your dryer operates at peak efficiency with the WE14X25080 lint filter trap assembly from GE. Designed for seamless compatibility with GE, Hotpoint, Haier, Monogram, and Café appliances, this essential component helps prevent lint buildup, enhancing airflow and reducing fire hazards. Crafted from high-quality materials, it promises durability and reliability, making it a wise investment for any dryer maintenance.
This assembly is easy to install, ensuring you can restore your dryer’s performance quickly and with minimal hassle. Ideal for homeowners who prioritize safety and efficiency, the WE14X25080 is a crucial addition to your dryer parts toolkit. Keep laundry day smooth and worry-free by upgrading to this effective lint filter trap assembly today.
Weight : 35.65 lbs
Package Dimension : 28.39 x 26.89 x 7.87
Please Verify Your Purchase to Submit a Review
The following parts are replaced by this product
- WE14M79
- WE14M92
- WE14X20425
- WE14X21334
- WE14M0079
- WE14M0092
- WE14M0076
1. Unplug the appliance from the power outlet and turn off the gas supply, if applicable.
2. Remove all the screws holding the trap duct assembly in place and carefully remove not to damage any parts.
3. Pull out the old trap duct assembly and discard it.
4. Line up the new trap duct assembly in the space, ensuring it fits properly and the bolt holes line up.
5. Secure the new trap duct assembly with the screws, tightening each securely.
6. Plug the appliance back into the power outlet, if applicable, and turn the gas supply back on.
7. Test the appliance to ensure proper operation.
Please keep in mind, these instructions are for general guidance and should always be used in conjunction with the manufacturer's manual, if available.


