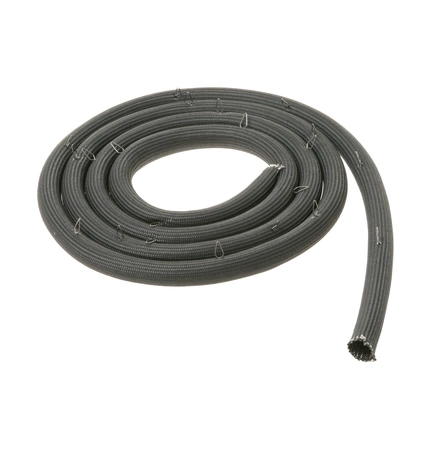
WB04T10086 GE Oven Door Gasket

WB04T10086 is an original equipment manufactured (OEM) part. Ensure optimal performance and energy efficiency in your oven with this high-quality gasket and seal. Designed specifically for various GE models, including Hotpoint, Haier, Monogram, and Café, this part guarantees a snug fit to prevent heat loss and maintain even cooking temperatures.
Constructed from durable materials, the WB04T10086 seals out unwanted air, reducing energy consumption and enhancing the cooking experience. Its easy installation process allows you to replace your worn or damaged gasket swiftly, restoring your oven to peak functionality.
Ideal for anyone looking to improve their appliance's performance, this gasket is an essential component for reliable and effective cooking. Maintain your oven today to ensure delicious results with every meal.
Weight : 0.82 lbs
Package Dimension : 11.65 x 6.73 x 1.46
Product Details
Reviews
Replaces Parts
Installation Instructions
Compatible Models
Compatible Brands
WB04T10086 is an original equipment manufactured (OEM) part. Ensure optimal performance and energy efficiency in your oven with this high-quality gasket and seal. Designed specifically for various GE models, including Hotpoint, Haier, Monogram, and Café, this part guarantees a snug fit to prevent heat loss and maintain even cooking temperatures.
Constructed from durable materials, the WB04T10086 seals out unwanted air, reducing energy consumption and enhancing the cooking experience. Its easy installation process allows you to replace your worn or damaged gasket swiftly, restoring your oven to peak functionality.
Ideal for anyone looking to improve their appliance's performance, this gasket is an essential component for reliable and effective cooking. Maintain your oven today to ensure delicious results with every meal.
Weight : 0.82 lbs
Package Dimension : 11.65 x 6.73 x 1.46
Please Verify Your Purchase to Submit a Review
The following parts are replaced by this product
- WB04T10001
1. Begin by unplugging the oven or disconnecting the power source.
2. Open the oven door and remove the existing gasket by pulling it away from the door frame.
3. Clean any food debris, grease, and dirt from the door frame using a damp cloth.
4. Check the new gasket for length, width, and thickness from the manufacturer's specifications.
5. Align the new gasket with the door frame and press it into place. Make sure that the gasket is in the correct position and secure.
6. Close the oven door and plug in the oven or reconnect the power source.
7. Test the oven to ensure the gasket is securely in place.
Please keep in mind, these instructions are for general guidance and should always be used in conjunction with the manufacturer's manual, if available.


