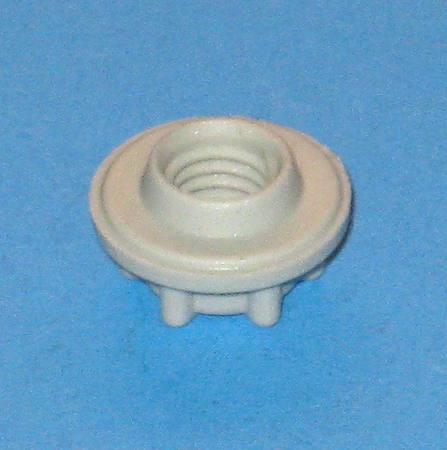
WP99002654 Whirlpool Nut

Whirlpool WP99002654 NUT.DISHWASHER SPRAY ARM We're your #1 source for genuine OEM appliance parts. Contact us for further questions as well as any other appliance parts needs!
Weight : 0.04 lbs
Package Dimension : 3.35 x 2.09 x 0.79
Product Details
Reviews
Replaces Parts
Installation Instructions
Compatible Models
Compatible Brands
Whirlpool WP99002654 NUT.DISHWASHER SPRAY ARM We're your #1 source for genuine OEM appliance parts. Contact us for further questions as well as any other appliance parts needs!
Weight : 0.04 lbs
Package Dimension : 3.35 x 2.09 x 0.79
Please Verify Your Purchase to Submit a Review
Please note: We use this information only to confirm your purchase, it won’t be published.
The following parts are replaced by this product
- 99002654
Replacing the Whirlpool WP99002654 NUT Step by Step
1. Gather the materials and tools needed before starting the repair. You will need a socket set, a wrench, a flat-head screwdriver, the replacement NUT (Whirlpool WP99002654), and a pair of safety glasses.
2. Put on the safety glasses to protect your eyes from hazards.
3. Locate the faulty NUT and remove it using a socket set and wrench.
4. Place the new NUT into position and secure it with a flat-head screwdriver.
5. Use the socket set and wrench to firmly tighten the new NUT in place.
6. Double check the installation to make sure that the NUT is properly secured.
7. Once the installation is completed, you can remove the safety glasses and store away the tools and materials for future use.
Congratulations! You have successfully replaced the Whirlpool WP99002654 NUT.
Please keep in mind, these instructions are for general guidance and should always be used in conjunction with the manufacturer's manual, if available.


