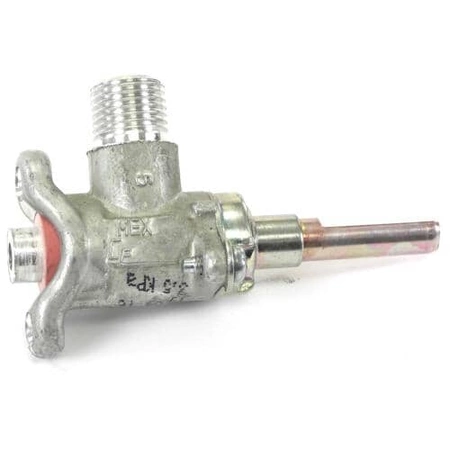
W10831822 Whirlpool Burner Valve

W10831822 Whirlpool Burner Valve
Weight : 0.11 lbs
Package Dimension : 3.74 x 3.70 x 1.10
Product Details
Reviews
Replaces Parts
Installation Instructions
Compatible Models
Compatible Brands
W10831822 Whirlpool Burner Valve
Weight : 0.11 lbs
Package Dimension : 3.74 x 3.70 x 1.10
Please Verify Your Purchase to Submit a Review
The following parts are replaced by this product
- W10259053
- W10467714
DIY Whirlpool W10831822 VALVE-BRNR Replacement
Are you looking to replace the Whirlpool W10831822 VALVE-BRNR? This tutorial will walk you through the steps on how to do it yourself. Follow these steps carefully and you’ll have your Whirlpool device working like new in no time.
Step 1: Prepare
Before starting the replacement process, make sure to gather all your supplies. This includes the replacement W10831822 valve, screwdrivers, replacement screws, and any other tools you might need. Put on protective gloves and work in a well-ventilated area.
Step 2: Remove Old Valve
Once you have all the tools you need for the job, prepare to remove the old Whirlpool valve. Start by unplugging the appliance from any power source. Access the valve and unscrew the mounting screws that are holding it in place. Carefully remove the valve and set aside.
Step 3: Install New Valve
Now that the old valve is removed, you can start to install the replacement. Carefully line up the new valve with the opening and secure it with the mounting screws. Once the new valve is secured, reconnect the power source and turn on the appliance to ensure that it’s working properly.
Step 4: Test
Finally, it’s important to test the new valve before putting the appliance back in use. Flip the switch to the “test†position and wait for the appliance to cycle. If everything is working correctly, you should hear a click as the valve engages. Turn off the power and the appliance is now ready for use.
You’ve now successfully replaced the Whirlpool W10831822 VALVE-BRNR. Now that you’ve gone through this tutorial, you’re well on your way to doing repairs like a pro!
Please keep in mind, these instructions are for general guidance and should always be used in conjunction with the manufacturer's manual, if available.


