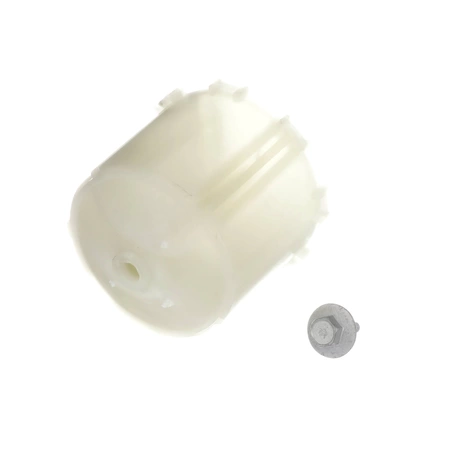
WH49X10042 GE Agitator Coupling Kit

WH49X10042 is an original equipment manufactured (OEM) part. Enhance the performance of your washing machine with this reliable agitator coupling kit from GE. Designed for compatibility with leading brands, including Hotpoint, Haier, Monogram, and Café, this essential component guarantees seamless operation and efficient washing cycles. The kit includes everything needed to replace a worn or damaged agitator coupling, restoring the appliance to its optimal state. Constructed with durable materials, it ensures longevity and consistent performance. Ideal for those experiencing issues with agitation in their washers, this product is a must-have for any appliance repair enthusiast. Trust GE's engineering excellence and bring new life to your washing machine with this dependable part.
Weight : 0.31 lbs
Package Dimension : 3.78 x 3.54 x 3.23
Product Details
Reviews
Replaces Parts
Installation Instructions
Compatible Models
Compatible Brands
WH49X10042 is an original equipment manufactured (OEM) part. Enhance the performance of your washing machine with this reliable agitator coupling kit from GE. Designed for compatibility with leading brands, including Hotpoint, Haier, Monogram, and Café, this essential component guarantees seamless operation and efficient washing cycles. The kit includes everything needed to replace a worn or damaged agitator coupling, restoring the appliance to its optimal state. Constructed with durable materials, it ensures longevity and consistent performance. Ideal for those experiencing issues with agitation in their washers, this product is a must-have for any appliance repair enthusiast. Trust GE's engineering excellence and bring new life to your washing machine with this dependable part.
Weight : 0.31 lbs
Package Dimension : 3.78 x 3.54 x 3.23
Please Verify Your Purchase to Submit a Review
The following parts are replaced by this product
- WH02X10037
- WH43X10009
- WH43X137
- WH2X1200
- WH02X1200
- WH43X0137
- WH49X10042-25PK
1. Begin by unplugging the washer from the wall outlet.
2. Next, remove the two clips holding the end of the drive tube to the motor.
3. Carefully remove the washer top panel and then loop the belt off the motor pulley.
4. Disconnect the water hose from the inlet valve and remove the two screws securing the inlet valve to the cabinet.
5. Lift the inlet valve out of the washer to gain access to the coupling.
6. The WH49X10042 coupling will be located underneath the inlet valve.
7. Gently pry the coupling off the motor shaft and then remove the three screws that are securing it to the cabinet.
8. Install the new WH49X10042 coupling by attaching it to the motor shaft, reattaching the three screws, and replacing the inlet valve.
9. Loop the belt back onto the motor pulley and then reconnect the clips securing the drive tube to the motor.
10. Reconnect the water hose to the inlet valve and replace the washer top panel.
11. Lastly, plug the washer back into the wall outlet, and you're done!
Please keep in mind, these instructions are for general guidance and should always be used in conjunction with the manufacturer's manual, if available.


