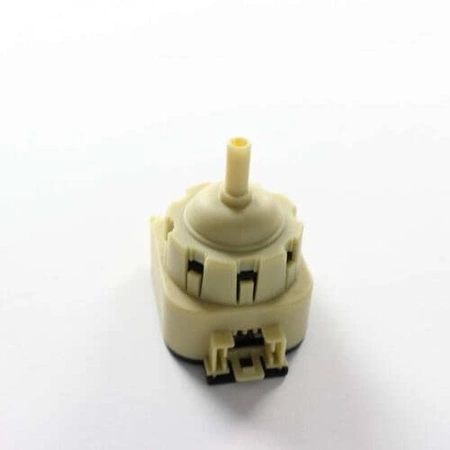
WH12X10595 GE Pressure Switch

Ensure your washing machine operates at peak performance with this essential pressure switch from a trusted brand. Designed for compatibility with GE, Hotpoint, Haier, Monogram, and Café appliances, this reliable switch plays a crucial role in regulating water levels during wash cycles. Constructed with durability in mind, it helps prevent overflows and optimizes the washing process to Maintain efficiency.
With its straightforward installation, you can quickly replace your old or malfunctioning switch, bringing life back to your washer. Ideal for both DIY enthusiasts and professional technicians, this part ensures your laundry routine remains uninterrupted. Invest in this high-quality component to maintain the reliability and effectiveness of your washing machine.
Weight : 0.52 lbs
Package Dimension : 6.00 x 6.00 x 2.00
Please Verify Your Purchase to Submit a Review
Please note: We use this information only to confirm your purchase, it won’t be published.
Step 1: Turn off the power to the washer. Unplug the washer and shut off the water supply.
Step 2: Remove the screws located at the back of the washer. Using a Phillips head screwdriver, remove the screws from the back panel and then lift it off the washer.
Step 3: Find the pressure sensor. The pressure sensor is located in the top right corner of the washer's interior and is connected to the control board with a wiring harness.
Step 4: Disconnect the wiring harness. Pull the release tab on the side of the harness and then gently pull the harness away from the sensor.
Step 5: Remove the mounting screws. There will be two or three screws holding the sensor in place. Use a Phillips head screwdriver to loosen the screws and then remove them.
Step 6: Remove the old pressure sensor. Carefully pull the sensor away from the washer and set it aside.
Step 7: Install the new sensor. Place the new sensor into the washer and then secure it with the mounting screws.
Step 8: Reconnect the wiring harness. Connect the wiring harness to the sensor and then firmly push the release tab closed until it clicks into place.
Step 9: Replace the back panel. Reattach the back panel and then use a Phillips head screwdriver to tighten the screws.
Step 10: Restore power and turn on the water supply. Plug in the washer and turn on the water supply. Turn on the power and check that the new sensor is functioning properly.
Please keep in mind, these instructions are for general guidance and should always be used in conjunction with the manufacturer's manual, if available.


