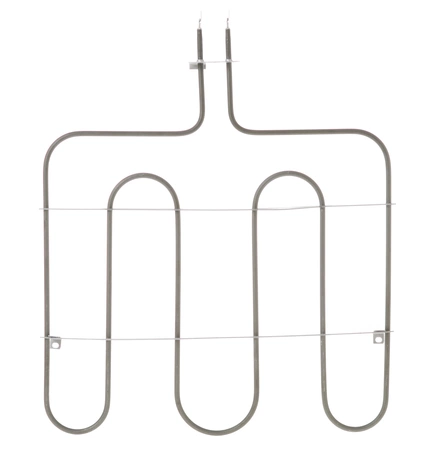
WB44T10094 GE Oven Broil Element

Elevate your cooking experience with this high-quality heating element designed for select ovens. Engineered with precision, it ensures optimal heat distribution, making broiling and baking more efficient. This reliable replacement part is compatible with various brands, including GE, Hotpoint, Haier, Monogram, and Café, making it a versatile choice for your appliance needs.
Installation is straightforward, allowing you to restore your oven's performance quickly. Whether you’re preparing a family meal or entertaining guests, this element delivers consistent results every time. Don’t let a faulty broil element hinder your culinary adventures—replace it and enjoy perfectly cooked dishes once again. Ensure your oven operates at peak performance with this essential component.
Weight : 5.39 lbs
Package Dimension : 23.00 x 18.10 x 1.80
Please Verify Your Purchase to Submit a Review
Step 1: Prepare to Replace the GE WB44T10094 Unit Broil Assembly
Start by gathering the appropriate tools and materials you need to replace the broil assembly. You will need a screwdriver, GE WB44T10094 Unit Broil Assembly, and food-safe gloves.
Step 2: Remove the Old Broil Assembly
Put on food-safe gloves before beginning. Now locate the screws holding the old broil assembly in place. Use a screwdriver to remove these screws and set them aside. Carefully pull out the old broil assembly.
Step 3: Install the New Broil Assembly
Take the new GE WB44T10094 Unit Broil Assembly and place it into the same spot you removed the old one from. Make sure it fits snugly into place. Secure it by inserting the screws removed from step two.
Step 4: Check for Proper Alignment
Make sure the new broil assembly is properly aligned. Check that the hinges move freely and the connection points are secured properly.
Step 5: Clean Up
Discard the old broil assembly in a safe and responsible manner. Remove the food-safe gloves and throw them away. Wipe down the area around the new broil assembly to remove any debris or dust.
Step 6: Test the New Broil Assembly
Turn on the oven and perform a basic test to make sure the new broil assembly is working properly. If everything looks good, you’re done! Your GE WB44T10094 Unit Broil Assembly has been replaced.
Please keep in mind, these instructions are for general guidance and should always be used in conjunction with the manufacturer's manual, if available.


