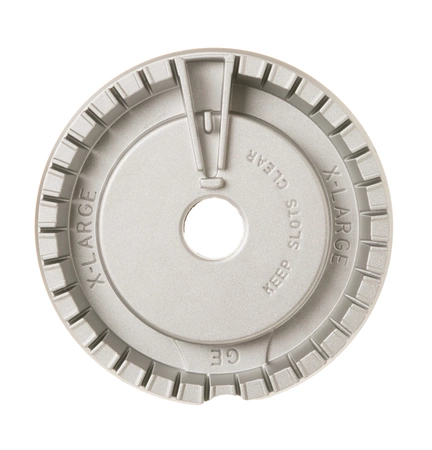
WB16X24722 GE Oven Gas Range XL Surface Burner

Maintain your cooking experience with this high-quality gas burner and control valve from GE. Designed for optimal performance, this part is compatible with various brands including Hotpoint, Haier, Monogram, and Café, ensuring seamless integration with your appliance. Crafted for GE ovens, this burner enhances heat distribution, allowing for precise cooking and even results.
With the SKU WB16X24722, this reliable component not only replaces worn or malfunctioning parts but also offers the durability and efficiency you expect from GE. Perfect for home chefs looking to Maintain their kitchen, this gas burner helps you achieve consistent results whether you're simmering sauces or searing meats. Elevate your culinary skills with this essential oven part, ensuring your range operates at its best.
Weight : 0.27 lbs
Package Dimension : 4.25 x 4.17 x 2.09
Please Verify Your Purchase to Submit a Review
Step 1: Turn off the power. To safely replace the GE XL Burner, V2 WB16X24722, shut off the power to the appliance at the circuit breaker.
Step 2: Remove the old burner. Unscrew and remove the mounting screws that are holding the old burner and lift it out of the opening. Disconnect and remove the attached wires from the old burner.
Step 3: Install the new burner. Connect the wires to the new burner, then secure it with the mounting screws.
Step 4: Test the burner. Turn the power back on, and test the burner to ensure it is working properly.
Please keep in mind, these instructions are for general guidance and should always be used in conjunction with the manufacturer's manual, if available.


