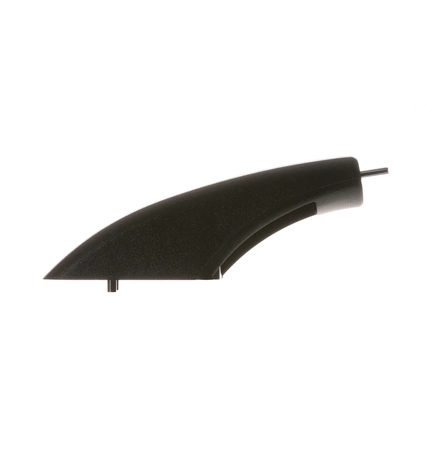
WB07X10034 GE Range Handle End Cap

Elevate the functionality and appearance of your oven with this durable end cap specifically designed for GE and compatible brands including Hotpoint, Haier, Monogram, and Café. Crafted for long-lasting use, this handle end cap ensures a secure fit and easy installation, making it an essential part for maintaining your appliance. Whether you're repairing a worn handle or updating your kitchen's look, this high-quality replacement enhances both performance and aesthetics. Suitable for various oven models, it guarantees reliable operation while seamlessly blending with existing hardware. Maintain your kitchen with this essential oven part for a fresh, polished finish and optimal use.
Weight : 0.25 lbs
Package Dimension : 6.73 x 2.20 x 2.36
Please Verify Your Purchase to Submit a Review
Replacing the WB07X10034 GE Handle End Cap
Replacing the handle end cap on your GE model appliance is a straightforward DIY project. With a few basic tools and this step-by-step guide, you’ll have your appliance looking like new in no time.
Materials:
-New WB07X10034 GE handle end cap
-Phillips screwdriver
-Small flathead screwdriver (optional)
Step 1: Unscrew the existing handle end cap from the appliance. Use a Phillips screwdriver to unscrew the two screws securing the cap. Carefully remove the screws, then gently pull the handle end cap away from the appliance.
Step 2: Inspect the area for dirt and debris. Use a small flathead screwdriver or other tool to clear out any dust or dirt from the area the handle end cap will be mounted.
Step 3: Apply lubricant to the new handle end cap. Place a few drops of lubricant on the back of the new handle end cap. This will help ensure the end cap slides smoothly into place without creating extra stress on the appliance.
Step 4: Place the new handle end cap onto the appliance. Align the handle end cap with the holes in the appliance, then slide the handle into place.
Step 5: Secure the end cap with screws. Once the handle is in the correct position, use the Phillips screwdriver to fasten the two screws. Make sure the screws are tight.
Step 6: Test the end cap. After the screws have been securely tightened, test to make sure the handle end cap is firmly attached. Give the handle a gentle pull, it should stay firmly in place.
Please keep in mind, these instructions are for general guidance and should always be used in conjunction with the manufacturer's manual, if available.


