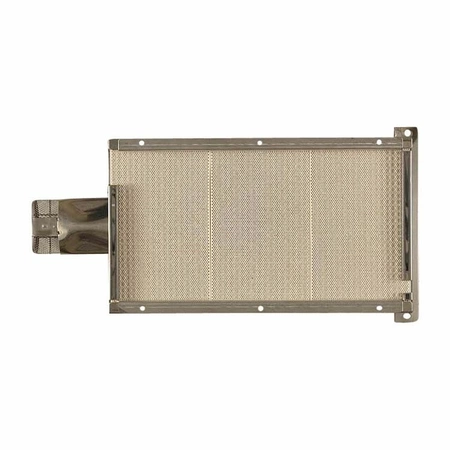
WPW10134795 Whirlpool Burner

WPW10134795 is an original equipment manufactured (OEM) part. Maintain your cooking experience with this high-quality heating element designed for various oven brands including Admiral, Amana, Jenn-Air, Kenmore, Kitchenaid, Magic Chef, Maytag, Norge, Roper, and Whirlpool. Engineered for durability and efficiency, this burner ensures even heat distribution, allowing for perfectly cooked meals every time.
Easy to install, it’s a reliable solution for restoring your oven's performance. Ideal for home chefs who demand consistent results, this part is a direct replacement for your appliance, ensuring compatibility and seamless operation.
Don’t let a faulty heating element interrupt your culinary plans; enhance your kitchen with this essential oven component today and enjoy the convenience of a fully functional appliance.
Weight : 3.60 lbs
Package Dimension : 22.75 x 9.25 x 2.38
Product Details
Reviews
Replaces Parts
Installation Instructions
Compatible Models
Compatible Brands
WPW10134795 is an original equipment manufactured (OEM) part. Maintain your cooking experience with this high-quality heating element designed for various oven brands including Admiral, Amana, Jenn-Air, Kenmore, Kitchenaid, Magic Chef, Maytag, Norge, Roper, and Whirlpool. Engineered for durability and efficiency, this burner ensures even heat distribution, allowing for perfectly cooked meals every time.
Easy to install, it’s a reliable solution for restoring your oven's performance. Ideal for home chefs who demand consistent results, this part is a direct replacement for your appliance, ensuring compatibility and seamless operation.
Don’t let a faulty heating element interrupt your culinary plans; enhance your kitchen with this essential oven component today and enjoy the convenience of a fully functional appliance.
Weight : 3.60 lbs
Package Dimension : 22.75 x 9.25 x 2.38
Please Verify Your Purchase to Submit a Review
Please note: We use this information only to confirm your purchase, it won’t be published.
The following parts are replaced by this product
- W10137071
- W10134795
Step 1: Unplug your stove from the wall socket and turn off the breaker that controls the oven.
Step 2: Remove the top grates and any other objects on the burner surface of your range.
Step 3: Locate the screws that hold the control panel down. This can usually be found on either side of the control knobs, or directly behind the control knobs. Use a Phillips-head screwdriver to remove those screws.
Step 4: Remove the control panel. Carefully lift it up and off and set aside.
Step 5: Now locate the screws that secure the burner box in place. Use a Phillips-head screwdriver to loosen these screws.
Step 6: Once the screws have been loosened, use a pair of needle-nose pliers to carefully remove the wires connected to the old burner box.
Step 7: Now you can remove the old burner box. Place the new burner box in its place and secure it with the screws you removed earlier.
Step 8: Use the needle-nose pliers to reconnect the wires to the new burner box. Make sure the connections are secure.
Step 9: Replace the control panel and secure it with the screws you removed in step 3.
Step 10: Turn the power to the oven back on and plug it back into the wall socket. Make sure the burner works properly.
Step 11: Replace the grates and any other objects that you removed earlier.
You have now successfully replaced the Whirlpool WPW10134795 BURNER box.
Please keep in mind, these instructions are for general guidance and should always be used in conjunction with the manufacturer's manual, if available.


