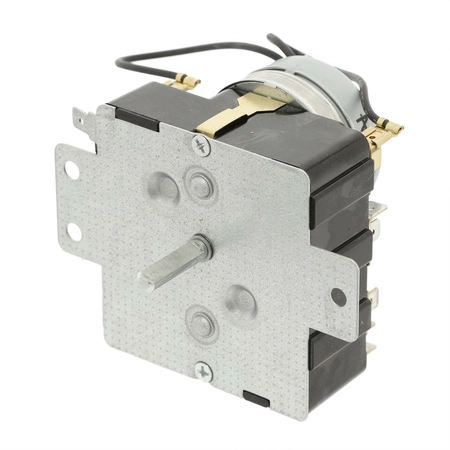
WP8566184 Whirlpool Timer

This Dryer Timer controls the electrical components and the duration of dryer cycles. If any of the contacts inside the part have burned out, or if the motor has shorted out and is no longer advancing the timer, this part may need to be replaced. Replacing this part will require basic hand tools, some disassembly of the dryer and novice repair experience. You must unplug the dryer or shut off the house circuit breaker for the appliance before installing this part.
Part Specification
• This product is a Factory Certified Part. These three words represent quality parts and accessories designed specifically for your appliance. Time tested engineering that meets our strict quality specifications
• This product is a replacement part
• Package contains (1) Dryer Timer
• Tools Needed: Multi screwdriver
Weight : 0.77 lbs
Package Dimension : 5.51 x 4.17 x 4.65
Product Details
Reviews 2
Replaces Parts
Installation Instructions
Compatible Models
Compatible Brands
This Dryer Timer controls the electrical components and the duration of dryer cycles. If any of the contacts inside the part have burned out, or if the motor has shorted out and is no longer advancing the timer, this part may need to be replaced. Replacing this part will require basic hand tools, some disassembly of the dryer and novice repair experience. You must unplug the dryer or shut off the house circuit breaker for the appliance before installing this part.
Part Specification
• This product is a Factory Certified Part. These three words represent quality parts and accessories designed specifically for your appliance. Time tested engineering that meets our strict quality specifications
• This product is a replacement part
• Package contains (1) Dryer Timer
• Tools Needed: Multi screwdriver
Part Specification
• This product is a Factory Certified Part. These three words represent quality parts and accessories designed specifically for your appliance. Time tested engineering that meets our strict quality specifications
• This product is a replacement part
• Package contains (1) Dryer Timer
• Tools Needed: Multi screwdriver
Weight : 0.77 lbs
Package Dimension : 5.51 x 4.17 x 4.65
Please Verify Your Purchase to Submit a Review
The following parts are replaced by this product
- 8566184
Step 1: Unplug and disconnect the power to the washer.
Step 2: Open the dryer cabinet to access the timer. Depending on your model, it may be located behind a panel near the control knobs or near the back of the dryer.
Step 3: Once you have located the timer, detach the two wires connected to the terminals (labeled ‘Power’ and ‘Ground’).
Step 4: Using a screwdriver, remove the two screws that attach the timer to the side of the washer cabinet.
Step 5: Remove the timer and then take a picture of the backside of the timer so you will know how to connect the new one.
Step 6: Insert the new timer in place and secure it with the two screws.
Step 7: Connect the two wires to the same terminals (‘Power’ and ‘Ground’) as indicated in the picture you took.
Step 8: Test the new timer by plugging the washer back in and turning it on.
Step 9: If the washer works properly, reinstall the dryer cabinet panel and you’re all done!
Please keep in mind, these instructions are for general guidance and should always be used in conjunction with the manufacturer's manual, if available.


