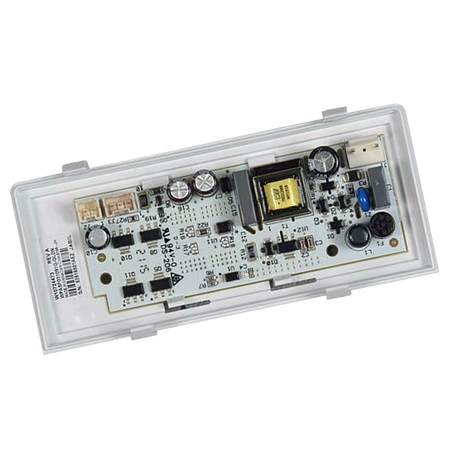
W11226500 Whirlpool LED Light

W11226500 is an original equipment manufactured (OEM) part. Enhance your refrigerator's lighting with this efficient LED light designed for a variety of compatible brands including Admiral, Amana, Jenn-Air, Kenmore, KitchenAid, Magic Chef, Maytag, Norge, Roper, and Whirlpool. This high-quality replacement bulb ensures optimal brightness while consuming minimal energy, making it an eco-friendly choice for your appliance. Easy to install, it helps illuminate your refrigerator’s interior, allowing you to quickly locate your favorite foods and beverages. Ideal for homeowners looking to improve visibility inside their fridge, this durable light promises longevity and performance. Maintain your appliance today with this reliable lighting solution and enjoy a brilliantly lit refrigerator.
Weight : 0.43 lbs
Package Dimension : 5.00 x 4.00 x 3.00
Product Details
Reviews
Replaces Parts
Installation Instructions
Compatible Models
Compatible Brands
W11226500 is an original equipment manufactured (OEM) part. Enhance your refrigerator's lighting with this efficient LED light designed for a variety of compatible brands including Admiral, Amana, Jenn-Air, Kenmore, KitchenAid, Magic Chef, Maytag, Norge, Roper, and Whirlpool. This high-quality replacement bulb ensures optimal brightness while consuming minimal energy, making it an eco-friendly choice for your appliance. Easy to install, it helps illuminate your refrigerator’s interior, allowing you to quickly locate your favorite foods and beverages. Ideal for homeowners looking to improve visibility inside their fridge, this durable light promises longevity and performance. Maintain your appliance today with this reliable lighting solution and enjoy a brilliantly lit refrigerator.
Weight : 0.43 lbs
Package Dimension : 5.00 x 4.00 x 3.00
Please Verify Your Purchase to Submit a Review
The following parts are replaced by this product
- W10724473
DIY Instructions for Replacing a Whirlpool W11226500 Light Switch
1. First, make sure to unplug your appliance from the wall outlet and turn off the circuit breaker supplying power to it.
2. Open the back panel of the appliance and locate the light switch.
3. Disconnect the wires from the terminals on the old switch. It might be helpful to take a photo or make a diagram of the connections before you disconnect them.
4. Remove any mounting screws that are holding the old light switch in place and then remove the old switch.
5. Install the new light switch by connecting the wires to the matching terminals as they were before. Make sure to use the right type of wire connectors to ensure a good connection.
6. Mount the new light switch in its place and secure with any needed mounting screws.
7. Plug the appliance in and turn on the breaker.
8. Test the light switch by turning the light on/off to make sure it works properly.
Congratulations! You have successfully replaced the light switch on your Whirlpool W11226500 appliance.
Please keep in mind, these instructions are for general guidance and should always be used in conjunction with the manufacturer's manual, if available.


