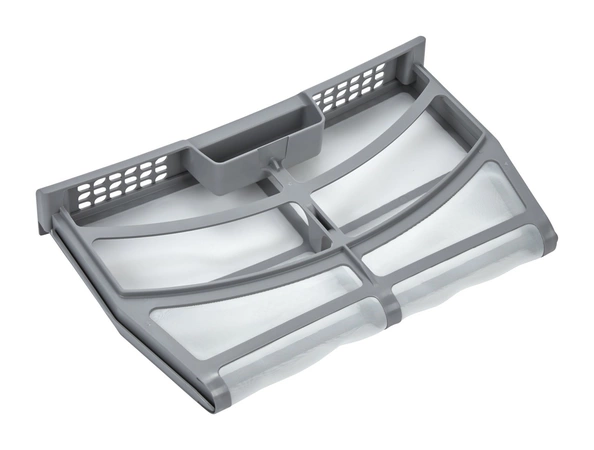
W10859086 Whirlpool Dryer Lint Screen

The Dryer Lint Screen is a white screen that provides proper air flow and operation of your dryer by trapping lint and debris from the exhaust air flowing from the dryer. After pulling the old filter out, be sure to clean the channels of the lint housing before inserting the new lint screen. The filter should be cleaned before every load of laundry and replaced immediately if damaged. This a replacement lint filter with handle measures approximately 3/8" thick on the left side and 5/8" thick on the right side. Replacing your dryer’s lint filter is a quick and essential way to keep your appliance operating at optimal levels. Installing this part requires no tools, disassembly or repair experience. Recommended Tool: The Cleaning Brush (item 4210463RW) is useful to remove lint and other debris from the dryer’s venting.
Part Specification
• This product is a Factory Certified Part. These three words represent quality parts and accessories designed specifically for your appliance. Time tested engineering that meets our strict quality specifications
• This product is a replacement part
• Package contains (1) Dryer Lint Screen
• No tools required for installation
Weight : 4.04 lbs
Package Dimension : 15.87 x 13.03 x 2.72
Product Details
Reviews
Replaces Parts
Installation Instructions
Compatible Models
Compatible Brands
The Dryer Lint Screen is a white screen that provides proper air flow and operation of your dryer by trapping lint and debris from the exhaust air flowing from the dryer. After pulling the old filter out, be sure to clean the channels of the lint housing before inserting the new lint screen. The filter should be cleaned before every load of laundry and replaced immediately if damaged. This a replacement lint filter with handle measures approximately 3/8" thick on the left side and 5/8" thick on the right side. Replacing your dryer’s lint filter is a quick and essential way to keep your appliance operating at optimal levels. Installing this part requires no tools, disassembly or repair experience. Recommended Tool: The Cleaning Brush (item 4210463RW) is useful to remove lint and other debris from the dryer’s venting.
Part Specification
• This product is a Factory Certified Part. These three words represent quality parts and accessories designed specifically for your appliance. Time tested engineering that meets our strict quality specifications
• This product is a replacement part
• Package contains (1) Dryer Lint Screen
• No tools required for installation
Part Specification
• This product is a Factory Certified Part. These three words represent quality parts and accessories designed specifically for your appliance. Time tested engineering that meets our strict quality specifications
• This product is a replacement part
• Package contains (1) Dryer Lint Screen
• No tools required for installation
Weight : 4.04 lbs
Package Dimension : 15.87 x 13.03 x 2.72
Please Verify Your Purchase to Submit a Review
The following parts are replaced by this product
- W10608811
Replacing the Whirlpool Dryer Lint Screen (Part# W10859086)
Tools Required:
• Philips head screwdriver
• Needle nose pliers
Instructions:
1. Unplug your dryer to disconnect it from any electrical power source.
2. Pull the dryer out of its cabinet, if necessary. Depending on the accessibility of your dryer, you may need to first remove the top panel and then move the dryer away from the wall.
3. Locate the screws which secure the lint screen housing to the front of the dryer. Remove the screws using a Philips head screwdriver.
4. With the screws removed, pull out the lint screen housing. This will provide access to the lint screen.
5. Grasp the handle of the lint screen and use needle nose pliers to remove the plastic clips which secure the screen in place.
6. Remove the old screen.
7. Replace the lint screen with the new one. Make sure the clips are properly secured.
8. Replace the lint screen housing, securing it back in place with the screws.
9. Push the dryer back into the cabinet and restore power.
10. Test the dryer to make sure it works properly.
Congratulations, you have successfully replaced the Whirlpool Dryer Lint Screen (Part# W10859086)!
Please keep in mind, these instructions are for general guidance and should always be used in conjunction with the manufacturer's manual, if available.


