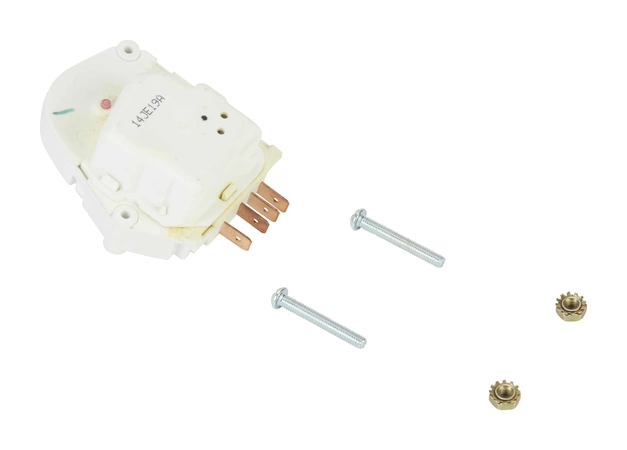
R0131577 Whirlpool Defrost Timer

The SxS Refrigerator Defrost Timer manages the automatic defrost cycle in your appliance’s freezer compartment. If the timer isn’t advancing like it should or triggering your freezer to enter defrost mode, the part could be broken and need replacement. This part also includes (2) nuts and (2) screws for mounting. Note that this part does not include the defrost timer knob, but you can purchase it separately. Turn the dial on the timer clockwise to advance it into and out of the defrost cycle. Installing this part will require basic hand tools, minor disassembly of the dishwasher and novice repair experience. Remember to unplug the refrigerator or shut off the house circuit breaker for the appliance before installing this part.
Part Specification
• This product is a Factory Certified Part. These three words represent quality parts and accessories designed specifically for your appliance. Time tested engineering that meets our strict quality specifications
• This product is a replacement part
• Package contains (1) SxS Refrigerator Defrost Thermostat
• Tools Needed: Multi screwdriver
Weight : 0.18 lbs
Package Dimension : 3.70 x 3.66 x 1.89
Product Details
Reviews
Replaces Parts
Installation Instructions
Compatible Models
Compatible Brands
The SxS Refrigerator Defrost Timer manages the automatic defrost cycle in your appliance’s freezer compartment. If the timer isn’t advancing like it should or triggering your freezer to enter defrost mode, the part could be broken and need replacement. This part also includes (2) nuts and (2) screws for mounting. Note that this part does not include the defrost timer knob, but you can purchase it separately. Turn the dial on the timer clockwise to advance it into and out of the defrost cycle. Installing this part will require basic hand tools, minor disassembly of the dishwasher and novice repair experience. Remember to unplug the refrigerator or shut off the house circuit breaker for the appliance before installing this part.
Part Specification
• This product is a Factory Certified Part. These three words represent quality parts and accessories designed specifically for your appliance. Time tested engineering that meets our strict quality specifications
• This product is a replacement part
• Package contains (1) SxS Refrigerator Defrost Thermostat
• Tools Needed: Multi screwdriver
Part Specification
• This product is a Factory Certified Part. These three words represent quality parts and accessories designed specifically for your appliance. Time tested engineering that meets our strict quality specifications
• This product is a replacement part
• Package contains (1) SxS Refrigerator Defrost Thermostat
• Tools Needed: Multi screwdriver
Weight : 0.18 lbs
Package Dimension : 3.70 x 3.66 x 1.89
Please Verify Your Purchase to Submit a Review
1. Before starting, switch off the power to the refrigerator at the circuit breaker and unplug it.
2.Remove access/ toe grille if necessary (This is not required for side mounted defrost timer models).
3.Inspect the wiring on current R0131577 Whirlpool Defrost Timer, making sure you have the same wiring configuration for the replacement timer.
4.Disconnect the electrical leads from the old timer and remove it from the appliance.
5.Install the new timer into the correct location in the appliance, and make sure you have securely tightened all screws/bolts.
6.Connect all electrical leads and ensure a secure connection.
7.Reconnect the power to the refrigerator and turn it back on.
8.Test the new timer by pressing the appropriate settings on the timer knob. The refrigerator should click on and off properly.
Please keep in mind, these instructions are for general guidance and should always be used in conjunction with the manufacturer's manual, if available.


