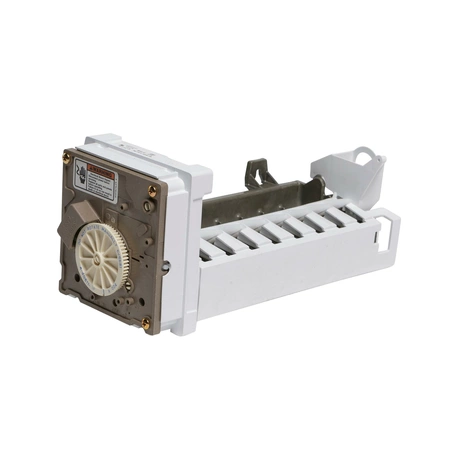
D7824706Q Whirlpool Refrigerator Ice Maker Assembly

This Refrigerator Ice Maker Assembly is a replacement for your refrigerator's ice maker. This model is for modular style ice makers, and does not include a new cover, ice level arm, or wire harness, these components will need to be reused from your original icemaker. If your appliance isn't dispensing ice as expected, replacing this part may alleviate the issue. Replacing this part will require basic hand tools, some disassembly of the refrigerator and novice repair experience. You must unplug the refrigerator or shut off the house circuit breaker for the appliance before installing this part. Also turn off the refrigerator's water supply before you begin.
Part Specification
• This product is a Factory Certified Part. These three words represent quality parts and accessories designed specifically for your appliance. Time tested engineering that meets our strict quality specifications
• This product is a replacement part
• Package contains (1) SxS Refrigerator Ice Maker Assembly
• Tools Needed: Multi screwdriver
Weight : 4.94 lbs
Package Dimension : 14.44 x 7.44 x 7.38
Product Details
Reviews
Replaces Parts
Installation Instructions
Compatible Models
Compatible Brands
This Refrigerator Ice Maker Assembly is a replacement for your refrigerator's ice maker. This model is for modular style ice makers, and does not include a new cover, ice level arm, or wire harness, these components will need to be reused from your original icemaker. If your appliance isn't dispensing ice as expected, replacing this part may alleviate the issue. Replacing this part will require basic hand tools, some disassembly of the refrigerator and novice repair experience. You must unplug the refrigerator or shut off the house circuit breaker for the appliance before installing this part. Also turn off the refrigerator's water supply before you begin.
Part Specification
• This product is a Factory Certified Part. These three words represent quality parts and accessories designed specifically for your appliance. Time tested engineering that meets our strict quality specifications
• This product is a replacement part
• Package contains (1) SxS Refrigerator Ice Maker Assembly
• Tools Needed: Multi screwdriver
Part Specification
• This product is a Factory Certified Part. These three words represent quality parts and accessories designed specifically for your appliance. Time tested engineering that meets our strict quality specifications
• This product is a replacement part
• Package contains (1) SxS Refrigerator Ice Maker Assembly
• Tools Needed: Multi screwdriver
Weight : 4.94 lbs
Package Dimension : 14.44 x 7.44 x 7.38
Please Verify Your Purchase to Submit a Review
Step by Step DIY Instructions on Replacing the D7824706Q Whirlpool Refrigerator Ice Maker Assembly
1. Unplug your refrigerator power cord from the electrical outlet or turn off the circuit breaker.
2. Remove the ice bucket. Locate the shut off arm on the side of the D7824706Q ice maker assembly, and push it up to the "Off" position.
3. Disconnect the electrical connector plug from the rear wall of the freezer compartment, then remove the three mounting screws that secure the ice maker assembly.
4. Carefully pull the ice maker assembly out of the freezer compartment.
5. Install the new ice maker assembly in the same way that you removed the old one. Teach the new ice maker assembly how to make cubes by pushing the shut off arm down into the "On" position.
6. Reattach the electrical connector plug to the back wall of the freezer. Secure the ice maker assembly with the new screws you removed in step 3.
7. Place the ice bucket back underneath the ice dispenser.
8. Turn on the power to your refrigerator and test the new ice maker assembly to make sure it's producing ice correctly.
Please keep in mind, these instructions are for general guidance and should always be used in conjunction with the manufacturer's manual, if available.


