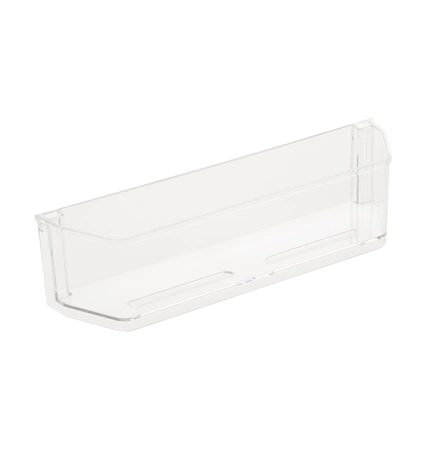
WR71X24976 GE Ice Bin Bottom Door

Maintain your refrigerator’s functionality with the WR71X24976 ice bin bottom door, designed specifically for GE appliances. This essential replacement part ensures proper sealing and efficiency, preventing ice from spilling and maintaining optimal cold storage conditions. Compatible with a range of brands including Hotpoint, Haier, Monogram, and Café, it offers versatility for various refrigerator models.
Crafted to meet high-quality standards, this door is an ideal solution for restoring your ice maker's performance. Installation is straightforward, allowing you to quickly replace a worn or damaged component and avoid costly repairs. Maintain the longevity and efficiency of your refrigerator with this reliable shelf and shelf support part, perfect for maintaining your appliance in top condition.
Weight : 3.99 lbs
Package Dimension : 14.70 x 6.40 x 5.90
Please Verify Your Purchase to Submit a Review
Please note: We use this information only to confirm your purchase, it won’t be published.
Replacing Your GE WR71X24976 Bottom Ice Door Bin
Tools Needed:
• Screwdriver
• Tweezers
Instructions:
1. Unplug your refrigerator from the wall socket and remove all shelves and bins from the bottom door.
2. Use a screwdriver to unscrew and remove the two screws securing the lower part of the ice bin door.
3. Carefully pull the lower part of the door away from the upper part of the door.
4. Once the lower section of the door has been removed, use tweezers to detach the broken or damaged GE WR71X24976 Bottom Ice Door Bin from the back of the lower section of the door.
5. Insert the new GE WR71X24976 Bottom Ice Door Bin into the back of the lower section of the door.
6. Place the lower section of the door against the upper portion of the door and secure using the two screws that were previously removed.
7. Re-attach the shelves and bins to the refrigerator.
8. Plug your refrigerator back in and replace any food that may have been removed during the repair process.
Congratulations! You have successfully replaced the GE WR71X24976 Bottom Ice Door Bin.
Please keep in mind, these instructions are for general guidance and should always be used in conjunction with the manufacturer's manual, if available.


