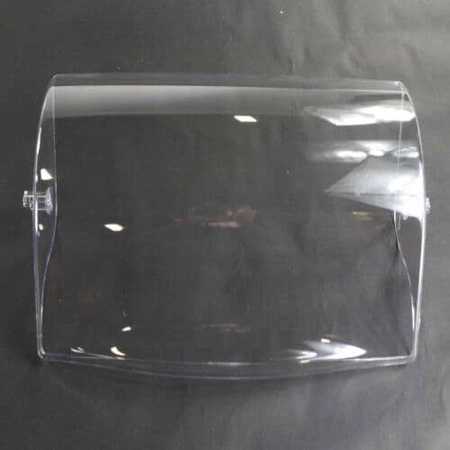
WR22X10042 GE Refrigerator Clear Dairy Door

Maintain the functionality of your refrigerator with this clear dairy door, designed specifically for select GE models as well as Hotpoint, Haier, Monogram, and Café appliances. This high-quality replacement part ensures that your dairy items are easily accessible while providing excellent visibility. Crafted for durability, it seamlessly fits into your refrigerator, allowing you to maintain organization and keep your dairy products fresh. Whether you're replacing a broken piece or upgrading your appliance, this clear dairy door is an essential component that aligns perfectly with your refrigerator's design. Keep your kitchen well-organized and your dairy items safely stored with this reliable part from a trusted brand. Maintain today for a better refrigerator experience.
Weight : 16.32 lbs
Package Dimension : 18.54 x 6.77 x 18.07
Please Verify Your Purchase to Submit a Review
How to Replace the GE WR22X10042 Dairy Door (Clear)
Replacing an old dairy door on your General Electric refrigerator is an easy DIY project that can be completed in a few simple steps. Follow along and you'll have your new Dairy Door installed in no-time!
1. Unplug the refrigerator from the wall socket and shut off water supply if applicable
2. Open the doors of the refrigerator and remove any contents from the shelves
3. Using a screwdriver, remove the screws that secure the existing Dairy Door in place (usually 7-8 screws)
4. Carefully detach the existing Dairy Door from the refrigerator frame
5. Take the new WR22X10042 Dairy Door (Clear) out of its packaging and make sure all of the parts are accounted for
6. Using the screws provided, attach the Dairy Door onto the refrigerator frame where you removed the old one
7. Plug the refrigerator back into the wall socket and turn on water supply if applicable
8. Fill the Dairy Door with necessary contents and close it securely
And that's it! Your new WR22X10042 GE Dairy Door (Clear) has been replaced and is now ready for use. Now sit back, take a deep breath and enjoy the clean, fresh look of your fridge.
Please keep in mind, these instructions are for general guidance and should always be used in conjunction with the manufacturer's manual, if available.


