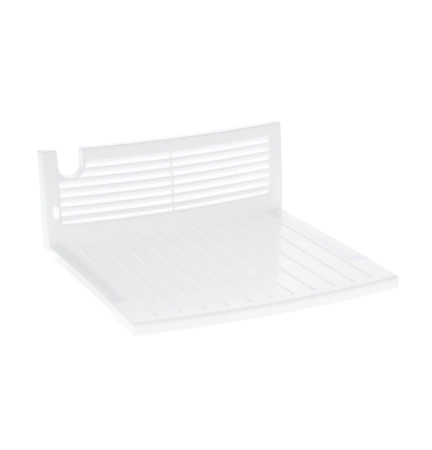
WR17X12911 GE Shelf

WR17X12911 is an original equipment manufactured (OEM) part. Maintain your refrigerator's storage capabilities with this high-quality shelf designed for seamless compatibility with GE, Hotpoint, Haier, Monogram, and Café appliances. This durable shelf provides an ideal solution for organizing your food items, maximizing space while ensuring everything is easily accessible. Crafted from sturdy materials, it's built to withstand everyday use, making it a reliable addition to your refrigerator parts. Whether you need a replacement or simply want to enhance your fridge's functionality, this shelf ensures a perfect fit and optimal performance, helping you maintain an efficient and tidy kitchen environment. Easy to install, it’s an essential component for any model in the compatible brands. Keep your refrigerator organized and efficient with this practical shelf solution.
Weight : 10.05 lbs
Package Dimension : 13.20 x 13.40 x 7.90
Product Details
Reviews
Replaces Parts
Installation Instructions
Compatible Models
Compatible Brands
WR17X12911 is an original equipment manufactured (OEM) part. Maintain your refrigerator's storage capabilities with this high-quality shelf designed for seamless compatibility with GE, Hotpoint, Haier, Monogram, and Café appliances. This durable shelf provides an ideal solution for organizing your food items, maximizing space while ensuring everything is easily accessible. Crafted from sturdy materials, it's built to withstand everyday use, making it a reliable addition to your refrigerator parts. Whether you need a replacement or simply want to enhance your fridge's functionality, this shelf ensures a perfect fit and optimal performance, helping you maintain an efficient and tidy kitchen environment. Easy to install, it’s an essential component for any model in the compatible brands. Keep your refrigerator organized and efficient with this practical shelf solution.
Weight : 10.05 lbs
Package Dimension : 13.20 x 13.40 x 7.90
Please Verify Your Purchase to Submit a Review
Please note: We use this information only to confirm your purchase, it won’t be published.
The following parts are replaced by this product
- WR71X10393
- WR17X11927
How to Replace the GE WR17X12911 Chiller Shelf
1. Unplug your refrigerator from the wall outlet or turn it off at the circuit breaker before beginning.
2. Remove everything from the shelf that needs to be replaced and set aside.
3. Slide out the shelf, but be careful not to damage the outer racks.
4. Locate the four screws holding the shelf in place.
5. Using a Phillips head screwdriver, loosen the screws and then remove them.
6. Carefully lift up the shelf to access the back and bottom edges of the shelf.
7. Peel back the heat-resistant tape to reveal the old shelf’s connection points.
8. Disconnect the wiring harness, if necessary.
9. Take the new GE WR17X12911 chiller shelf and slide it into place.
10. Line up the screws with the holes and carefully insert them.
11. Use the Phillips head screwdriver to secure the screws.
12. Reconnect the wiring harness, if applicable.
13. Ensure the shelf is completely level and secure.
14. Put the items back onto the shelf and plug the refrigerator back in or turn on the circuit breaker.
15. Test the shelf by opening and closing the door several times.
Congratulations! Your GE WR17X12911 chiller shelf has been successfully replaced.
Please keep in mind, these instructions are for general guidance and should always be used in conjunction with the manufacturer's manual, if available.


