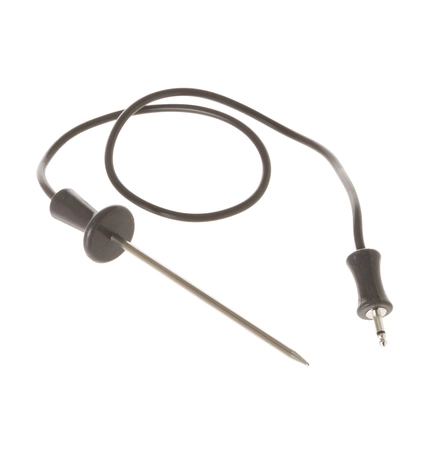
WB20T10023 GE Oven Heat Probe

Maintain the performance of your oven with this reliable heat probe designed specifically for GE appliances. This sensor and thermistor accurately monitors cooking temperatures, ensuring consistent results every time you use your oven. Compatible with various brands including Hotpoint, Haier, Monogram, and Café, it seamlessly integrates into your existing setup, making it an excellent choice for a wide range of kitchen appliances.
Crafted for durability and precision, this part guarantees efficient heating control, promoting successful cooking outcomes. Whether you're baking or roasting, having the right temperature is crucial, and this heat probe provides just that. Easy to install, it empowers you to maintain your appliance in optimal condition. Maintain your cooking experience and achieve culinary perfection with this essential oven component.
Weight : 0.55 lbs
Package Dimension : 10.00 x 8.50 x 0.90
Please Verify Your Purchase to Submit a Review
Please note: We use this information only to confirm your purchase, it won’t be published.
Step 1: Unplug the Range
Before you start any repair work, unplug the range from the power source to avoid any electrical issues while making repairs.
Step 2: Locate the Probe Thermistor
Locate where the probe thermistor is located on the wiring harness in your range. Use a flashlight and carefully inspect the back wall of the oven to locate the part.
Step 3: Disconnect the Wiring Harness
Unscrew any screws that are holding the wiring harness in place, then carefully disconnect the wires from the probe thermistor.
Step 4: Remove the Old Probe Thermistor
Use a pair of needle nose pliers to remove the old probe thermistor from the wiring harness.
Step 5: Install the New Probe Thermistor
Carefully connect the new probe thermistor to the wiring harness, ensuring each connection is firmly in place.
Step 6: Secure the Wiring Harness
Once all the wires are connected to the new probe thermistor, securely screw the wiring harness back in place.
Step 7: Test the New Probe Thermistor
Plug the range back into the power source, then turn the range on. Place a thermometer inside the oven and check the temperature accuracy against the reading on the thermistor. If everything is working correctly, you’ve successfully replaced the GE WB20T10023 probe thermistor!
Please keep in mind, these instructions are for general guidance and should always be used in conjunction with the manufacturer's manual, if available.


