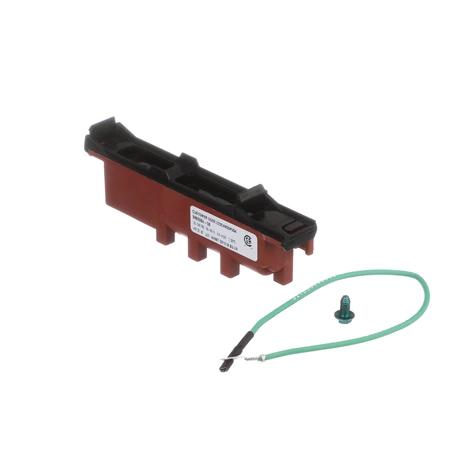
WB13X26360 GE Range Spark Module

Ensure your oven operates safely and efficiently with the ignition control component designed for select GE appliances. This high-quality spark module is compatible with various brands, including Hotpoint, Haier, Monogram, and Café, making it a versatile choice for your oven repair needs. Engineered for durability and performance, this part plays a crucial role in igniting your oven's burners, ensuring that every meal is cooked to perfection. Whether you’re replacing a worn-out module or upgrading your appliance, this GE spark module is the reliable choice to restore your oven’s functionality. Invest in this essential component to keep your cooking experience seamless and enjoyable.
Weight : 0.18 lbs
Package Dimension : 7.24 x 2.83 x 1.22
Product Details
Reviews
Replaces Parts
Installation Instructions
Compatible Models
Compatible Brands
Ensure your oven operates safely and efficiently with the ignition control component designed for select GE appliances. This high-quality spark module is compatible with various brands, including Hotpoint, Haier, Monogram, and Café, making it a versatile choice for your oven repair needs. Engineered for durability and performance, this part plays a crucial role in igniting your oven's burners, ensuring that every meal is cooked to perfection. Whether you’re replacing a worn-out module or upgrading your appliance, this GE spark module is the reliable choice to restore your oven’s functionality. Invest in this essential component to keep your cooking experience seamless and enjoyable.
Weight : 0.18 lbs
Package Dimension : 7.24 x 2.83 x 1.22
Please Verify Your Purchase to Submit a Review
The following parts are replaced by this product
- WB13K10019
- WB13K10033
Replacing the WB13X26360 GE Spark Module Kit
Step 1: Shut off power to stove. To do this, turn off the breaker associated with the stove, or unplug it from the wall.
Step 2: Locate the spark module. It can be found near the burner box on the back or under the stove.
Step 3: Remove the screws that secure the spark module. Use a screwdriver to remove the screws and set aside.
Step 4: Disconnect the wiring harness from the spark module. Carefully pull the wiring harness off of the spark module.
Step 5: Install the new spark module. Carefully connect the wiring harness to the new spark module and secure with the screws.
Step 6: Turn the power back on to the stove. Make sure the circuit breaker is switched back to the “on†position, or plug the stove back in.
Step 7: Test the spark module. Turn on a burner and check for sparking to ensure the spark module has been installed correctly. If there is no sparking, recheck the connections to make sure they are all properly connected.
Please keep in mind, these instructions are for general guidance and should always be used in conjunction with the manufacturer's manual, if available.


