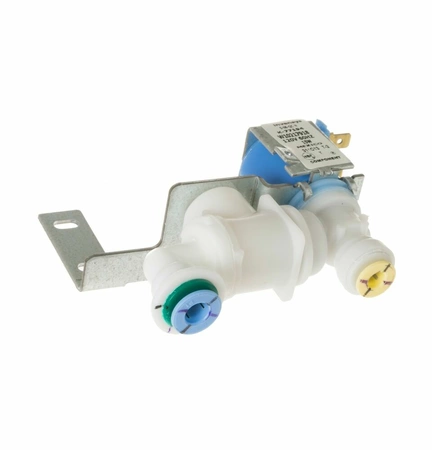
WPW10217918 Whirlpool Refrigerator Inlet Valve

WPW10217918 is an original equipment manufactured (OEM) part. Ensure your refrigerator operates efficiently with this high-quality inlet valve, specifically designed for various appliance brands, including Whirlpool, Maytag, and Kenmore. This essential part regulates water flow into your refrigerator, ensuring reliable ice making and cooling functions. Crafted for durability and optimal performance, it is a perfect replacement for worn-out valves, enhancing the overall functionality of your appliance. Suitable for models from Admiral, Amana, Jenn-Air, Kitchenaid, Magic Chef, Norge, and Roper, this versatile component is a must-have for your kitchen maintenance. With easy installation, you can restore your refrigerator's efficiency in no time. Keep your kitchen running smoothly with this reliable valve.
Weight : 0.45 lbs
Package Dimension : 4.37 x 4.25 x 3.35
Product Details
Reviews
Replaces Parts
Installation Instructions
Compatible Models
Compatible Brands
WPW10217918 is an original equipment manufactured (OEM) part. Ensure your refrigerator operates efficiently with this high-quality inlet valve, specifically designed for various appliance brands, including Whirlpool, Maytag, and Kenmore. This essential part regulates water flow into your refrigerator, ensuring reliable ice making and cooling functions. Crafted for durability and optimal performance, it is a perfect replacement for worn-out valves, enhancing the overall functionality of your appliance. Suitable for models from Admiral, Amana, Jenn-Air, Kitchenaid, Magic Chef, Norge, and Roper, this versatile component is a must-have for your kitchen maintenance. With easy installation, you can restore your refrigerator's efficiency in no time. Keep your kitchen running smoothly with this reliable valve.
Weight : 0.45 lbs
Package Dimension : 4.37 x 4.25 x 3.35
Please Verify Your Purchase to Submit a Review
The following parts are replaced by this product
- 2313644
- W10217918
DIY Instructions for Replacing the Whirlpool WPW10217918 VALVE
This guide will show you how to replace the Whirlpool WPW10217918 valve. The Whirlpool WPW10217918 valve is a part of many refrigerator models. It helps regulate the water supply to the ice maker and other parts of the refrigerator. If the valve isn’t functioning properly, it can cause leaks, noisy operation, and other issues. Fortunately, replacing the valve is relatively straightforward and can be done with common tools.
Here’s what you’ll need for the job:
- Phillips and flathead screwdrivers
- Plumber’s wrench or adjustable wrench
- Replacement Whirlpool WPW10217918 Valve
Step 1: Unplug your refrigerator from the power source.
Step 2: Shut off the water supply. Locate the shut-off valve near your refrigerator. Turn the valve clockwise to shut off the water supply.
Step 3: Open your refrigerator door and locate the existing valve. You may need to remove some screws to reach the valve.
Step 4: Disconnect the inlet water lines from the old valve. Use your adjustable wrench to loosen the fittings to disconnect them.
Step 5: Remove the mounting screws that attach the old valve to the refrigerator.
Step 6: Install the new Whirlpool WPW10217918 valve and secure it with screws.
Step 7: Reattach the inlet water lines. Reconnect the fittings using your adjustable or plumber’s wrench.
Step 8: Turn on the water supply and check for leaks.
Step 9: Plug in your refrigerator and test the ice maker.
Congratulations! You’ve successfully installed a new Whirlpool WPW10217918 valve. Now you can enjoy the peace of mind that comes with knowing that your refrigerator is working properly.
Please keep in mind, these instructions are for general guidance and should always be used in conjunction with the manufacturer's manual, if available.


