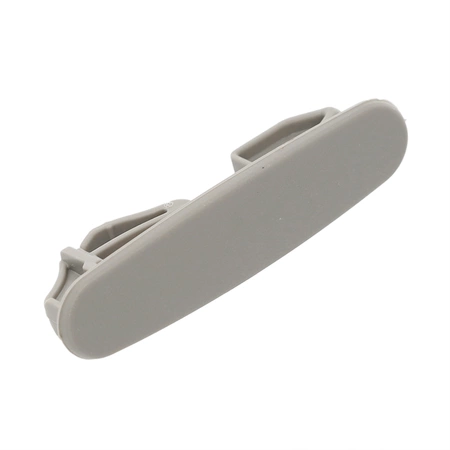
WP8565925 Whirlpool Slide Rail Stop

The Dishwasher Upper Dishrack Stop Clip ensures your appliance’s dishrack assembly doesn’t slide in too far and hit the rear wall of the cabinet during use. If your dishwasher's current stops are broken or damaged and no longer properly stopping the upper rack, you can easily replace them with this item. The stop clip light gray in color and measures approximately 2-1/4" W. Replacing this part will require no disassembly or repair experience. Helpful Tip: We also recommend using affresh® Dishwasher Cleaner (item W10282479) to help remove limescale and mineral build-up that can be unsightly and affect your dishwasher’s performance. *affresh® brand products are owned and distributed by Whirlpool Corporation.
Part Specification
• This product is a Factory Certified Part. These three words represent quality parts and accessories designed specifically for your appliance. Time tested engineering that meets our strict quality specifications
• This product is a replacement part
• Package contains (1) Dishwasher Dishrack Stop Clip
• Tools Needed: Flat-blade screwdriver
Weight : 0.02 lbs
Package Dimension : 3.39 x 1.02 x 0.94
Product Details
Reviews
Replaces Parts
Installation Instructions
Compatible Models
Compatible Brands
The Dishwasher Upper Dishrack Stop Clip ensures your appliance’s dishrack assembly doesn’t slide in too far and hit the rear wall of the cabinet during use. If your dishwasher's current stops are broken or damaged and no longer properly stopping the upper rack, you can easily replace them with this item. The stop clip light gray in color and measures approximately 2-1/4" W. Replacing this part will require no disassembly or repair experience. Helpful Tip: We also recommend using affresh® Dishwasher Cleaner (item W10282479) to help remove limescale and mineral build-up that can be unsightly and affect your dishwasher’s performance. *affresh® brand products are owned and distributed by Whirlpool Corporation.
Part Specification
• This product is a Factory Certified Part. These three words represent quality parts and accessories designed specifically for your appliance. Time tested engineering that meets our strict quality specifications
• This product is a replacement part
• Package contains (1) Dishwasher Dishrack Stop Clip
• Tools Needed: Flat-blade screwdriver
Part Specification
• This product is a Factory Certified Part. These three words represent quality parts and accessories designed specifically for your appliance. Time tested engineering that meets our strict quality specifications
• This product is a replacement part
• Package contains (1) Dishwasher Dishrack Stop Clip
• Tools Needed: Flat-blade screwdriver
Weight : 0.02 lbs
Package Dimension : 3.39 x 1.02 x 0.94
Please Verify Your Purchase to Submit a Review
The following parts are replaced by this product
- 8270105
- 8524582
- 8524581
- 8565920
- 8565925
- W10082860
- WP8565925VP
Step 1: Unplug the Appliance
Before you do any work on your dishwasher, it’s important to unplug the appliance from the wall outlet, to avoid any risk of electric shock.
Step 2: Remove the Panel Screws
Look for the two screws on the bottom of the access panel and remove them with a flat head screwdriver. Pull down the access panel.
Step 3: Find the WP8565925 Stop
Locate the WP8565925 stop at the top of the slide rail. This can be tricky, as it is often stuck between parts due to built-up grease and dirt.
Step 4: Disconnect the Wiring
Carefully disconnect the wiring from the WP8565925 stop by pressing in on the connector clips. Gently pull the wires away.
Step 5: Remove the WP8565925 Stop
Grip the stop firmly and pull it out from its mounting location on the slide rail.
Step 6: Install the New WP8565925 Stop
Place the new WP8565925 stop in its place, making sure that it is firmly connected. Re-connect the wiring, using the same method you used to disconnect them earlier.
Step 7: Replace the Access Panel
Put the access panel back onto the dishwasher and replace the two screws that were removed earlier.
Step 8: Plug in the Appliance
Once everything is in place, plug the appliance back into the wall outlet, and you’re done! Your dishwasher is now ready to use.
Please keep in mind, these instructions are for general guidance and should always be used in conjunction with the manufacturer's manual, if available.


