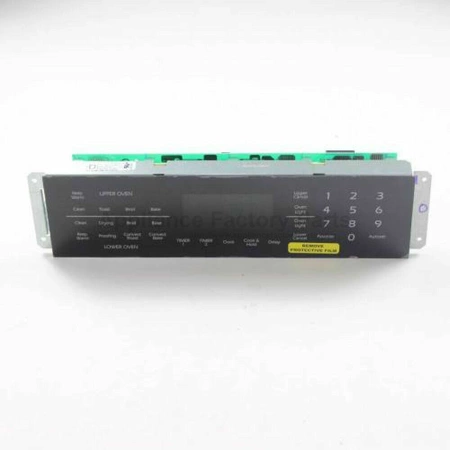
WP5701M796-60 Whirlpool Range Control Board

This Range Control Board and Clock monitors the oven temperature and controls the oven heating functions in the range, and includes the digital display for the time and temperature settings. The overlay/key panels are connected to the main board with a ribbon connector. Replacing this part will require basic hand tools, some disassembly of the oven and novice repair experience. You must unplug the oven or shut off the house circuit breaker for the oven before installing this part.
Part Specification
• This product is a Factory Certified Part. These three words represent quality parts and accessories designed specifically for your appliance. Time tested engineering that meets our strict quality specifications
• This product is a replacement part
• Package contains (1) Range Control Board and Clock
• Tools Needed: Multi screwdriver
Weight : 2.80 lbs
Package Dimension : 16.89 x 6.30 x 3.66
Product Details
Reviews
Replaces Parts
Installation Instructions
Compatible Models
Compatible Brands
This Range Control Board and Clock monitors the oven temperature and controls the oven heating functions in the range, and includes the digital display for the time and temperature settings. The overlay/key panels are connected to the main board with a ribbon connector. Replacing this part will require basic hand tools, some disassembly of the oven and novice repair experience. You must unplug the oven or shut off the house circuit breaker for the oven before installing this part.
Part Specification
• This product is a Factory Certified Part. These three words represent quality parts and accessories designed specifically for your appliance. Time tested engineering that meets our strict quality specifications
• This product is a replacement part
• Package contains (1) Range Control Board and Clock
• Tools Needed: Multi screwdriver
Part Specification
• This product is a Factory Certified Part. These three words represent quality parts and accessories designed specifically for your appliance. Time tested engineering that meets our strict quality specifications
• This product is a replacement part
• Package contains (1) Range Control Board and Clock
• Tools Needed: Multi screwdriver
Weight : 2.80 lbs
Package Dimension : 16.89 x 6.30 x 3.66
Please Verify Your Purchase to Submit a Review
Please note: We use this information only to confirm your purchase, it won’t be published.
The following parts are replaced by this product
- 74009980
- 5701M796-60
Step 1: Unplug the Whirlpool WP5701M796-60 CLOCKSWIT-Timer from the wall outlet.
Step 2: Open up the back of the timer by removing any screws that are holding it together.
Step 3: Carefully remove the wires from the timer, making sure to note which wires were attached to which terminals.
Step 4: Install the new timer following the instructions that came with it.
Step 5: Reconnect the wires to the new timer, making sure to connect them to the same terminals as before.
Step 6: Secure the back of the timer and replace any screws that were removed.
Step 7: Plug in the timer and test it to make sure it is working correctly.
Step 8: Adjust the settings on the timer accordingly.
Please keep in mind, these instructions are for general guidance and should always be used in conjunction with the manufacturer's manual, if available.


