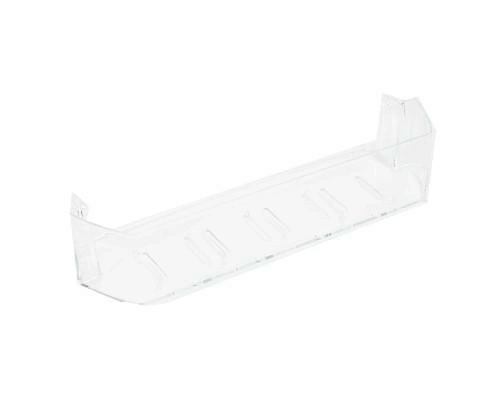
W11179386 Whirlpool Refrigerator Cantilever Bin

Organize your refrigerator with this high-quality cantilever bin designed for optimal storage and convenience. Crafted by Whirlpool, this durable bin is compatible with various brands, including Admiral, Amana, Jenn-Air, Kenmore, Kitchenaid, Magic Chef, Maytag, Norge, and Roper. Whether you need to replace a worn-out part or simply expand your refrigerator’s capacity, this drawer and pan style bin ensures easy access to your food items.
Perfect for holding everything from condiments to snacks, its contoured design maximizes space without sacrificing functionality. Designed specifically for refrigerators, it offers a seamless fit and reliable performance. Maintain your kitchen’s efficiency by adding this essential component, ensuring your food stays organized and within reach for all your culinary needs. Maintain your appliance today with this essential refrigerator part.
Weight : 9.67 lbs
Package Dimension : 7.87 x 7.50 x 20.75
Product Details
Reviews
Replaces Parts
Installation Instructions
Compatible Models
Compatible Brands
Organize your refrigerator with this high-quality cantilever bin designed for optimal storage and convenience. Crafted by Whirlpool, this durable bin is compatible with various brands, including Admiral, Amana, Jenn-Air, Kenmore, Kitchenaid, Magic Chef, Maytag, Norge, and Roper. Whether you need to replace a worn-out part or simply expand your refrigerator’s capacity, this drawer and pan style bin ensures easy access to your food items.
Perfect for holding everything from condiments to snacks, its contoured design maximizes space without sacrificing functionality. Designed specifically for refrigerators, it offers a seamless fit and reliable performance. Maintain your kitchen’s efficiency by adding this essential component, ensuring your food stays organized and within reach for all your culinary needs. Maintain your appliance today with this essential refrigerator part.
Weight : 9.67 lbs
Package Dimension : 7.87 x 7.50 x 20.75
Please Verify Your Purchase to Submit a Review
The following parts are replaced by this product
- W10364008
Step 1: Unplug the refrigerator from the wall outlet to ensure there is no power running to the device.
Step 2: Remove the shelves, drawers and bins that are inside the refrigerator by gently pulling them straight out.
Step 3: Locate the W11179386 Whirlpool Refrigerator Cantilever Bin. This can be found at the bottom of the refrigerator cavity and is mounted on a rail that stretches across the width.
Step 4: Gently remove the bin by lifting it up and sliding it off the rail.
Step 5: Place the new W11179386 Whirlpool Refrigerator Cantilever Bin onto the rail. Ensure the bin is pushed all the way in, so that it is securely in place.
Step 6: Replace the other shelves, drawers and bins that were removed in step two.
Step 7: Plug the refrigerator back in and turn it on.
Please keep in mind, these instructions are for general guidance and should always be used in conjunction with the manufacturer's manual, if available.


