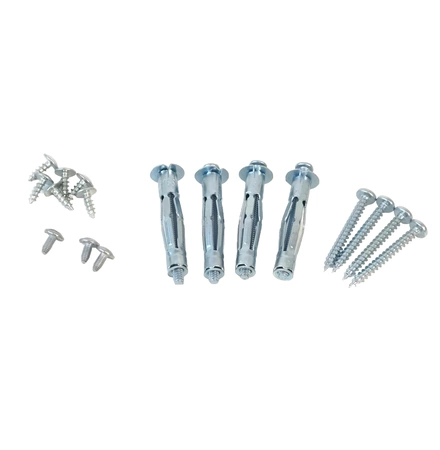
W11123666 Whirlpool Hardware Kit

Ensure your range operates seamlessly with this essential fastener kit from a trusted brand. Designed for compatibility with a wide range of appliances, including Admiral, Amana, Jenn-Air, Kenmore, Kitchenaid, Magic Chef, Maytag, Norge, Roper, and Whirlpool, this hardware kit is ideal for repairs and maintenance. Crafted for durability and precision, it features high-quality components that secure various parts of your range, promoting optimal performance. Whether you’re tackling a DIY repair or upgrading your kitchen's functionality, this fastener kit provides the reliability you need. Keep your appliance in top condition and extend its life with this straightforward, easy-to-install solution. Perfect for homeowners and professionals alike!
Ensure your range operates seamlessly with this essential fastener kit from a trusted brand. Designed for compatibility with a wide range of appliances, including Admiral, Amana, Jenn-Air, Kenmore, Kitchenaid, Magic Chef, Maytag, Norge, Roper, and Whirlpool, this hardware kit is ideal for repairs and maintenance. Crafted for durability and precision, it features high-quality components that secure various parts of your range, promoting optimal performance. Whether you’re tackling a DIY repair or upgrading your kitchen's functionality, this fastener kit provides the reliability you need. Keep your appliance in top condition and extend its life with this straightforward, easy-to-install solution. Perfect for homeowners and professionals alike!
Please Verify Your Purchase to Submit a Review
Please note: We use this information only to confirm your purchase, it won’t be published.
Replacing the Whirlpool W11123666 HARDWARE KIT
1. Gather the necessary tools and equipment needed to complete the job. You will need a screwdriver, pliers, and replacement parts (if any) for the Whirlpool W11123666 HARDWARE KIT.
2. Unplug the appliance from the wall outlet and turn off any electrical switches connected to it.
3. Locate the Whirlpool W11123666 HARDWARE KIT on the back or underside of the unit.
4. Remove the old hardware kit from the appliance. Be sure to note which screws to remove and how they were attached.
5. Install the replacement hardware kit using the same screws and steps as used to remove the old one.
6. Plug the appliance back into the wall outlet and turn on any switches that are required.
7. Test the unit to ensure the new hardware is attached properly and that the appliance is operating correctly.
8. If everything checks out, you have successfully replaced the Whirlpool W11123666 HARDWARE KIT!
Please keep in mind, these instructions are for general guidance and should always be used in conjunction with the manufacturer's manual, if available.


