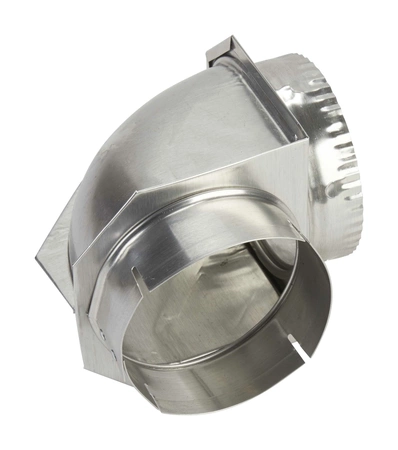
4396006RW Whirlpool Dryer 4" Diameter Aluminum Vent Elbow

This Dryer Elbow Vent Connector effectively turns 90-deg within 4-1/2". It features snap-lock fittings with rotating collars and is designed to be used in small spaces. This universal accessory can be used with many different brands and models; check to see if your model number is compatible. Installing this accessory will require no disassembly or repair experience.
Part Specification
• This product is a Factory Certified Accessory. These three words represent quality parts and accessories designed specifically for your appliance. Time tested engineering that meets our strict quality specifications
• Package contains (1) Dryer Elbow Vent Connector
• Tools Needed: Multi screwdriver
Weight : 1.26 lbs
Package Dimension : 7.40 x 5.31 x 4.45
Product Details
Reviews
Replaces Parts
Installation Instructions
Compatible Models
Compatible Brands
This Dryer Elbow Vent Connector effectively turns 90-deg within 4-1/2". It features snap-lock fittings with rotating collars and is designed to be used in small spaces. This universal accessory can be used with many different brands and models; check to see if your model number is compatible. Installing this accessory will require no disassembly or repair experience.
Part Specification
• This product is a Factory Certified Accessory. These three words represent quality parts and accessories designed specifically for your appliance. Time tested engineering that meets our strict quality specifications
• Package contains (1) Dryer Elbow Vent Connector
• Tools Needed: Multi screwdriver
Part Specification
• This product is a Factory Certified Accessory. These three words represent quality parts and accessories designed specifically for your appliance. Time tested engineering that meets our strict quality specifications
• Package contains (1) Dryer Elbow Vent Connector
• Tools Needed: Multi screwdriver
Weight : 1.26 lbs
Package Dimension : 7.40 x 5.31 x 4.45
Please Verify Your Purchase to Submit a Review
The following parts are replaced by this product
- 4396006
- 10131
Step-by-Step DIY Instructions for Replacing a Whirlpool 4" Dia. Dryer Close Aluminum Vent Elbow 4396006RW
1. Unplug the dryer and power off any gas lines connected to it.
2. Move the dryer away from the wall and pull the vent duct out of the wall.
3. Loosen the screws or clamps on the old elbow and remove it.
4. Set the new vent elbow in place and secure with the same screws or clamps.
5. Connect the new elbow to the vent duct and secure it with tape or other appropriate connectors.
6. Plug in the dryer and turn the power back on to check for proper operation.
Please keep in mind, these instructions are for general guidance and should always be used in conjunction with the manufacturer's manual, if available.


