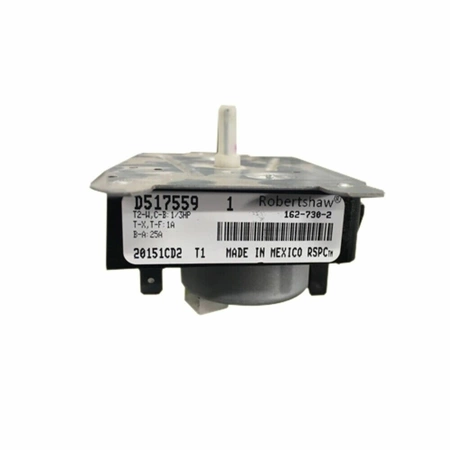
D517559 Speed Queen Dryer 3 Cycle Timer 240V

Maintain your laundry experience with the D517559 Timer for your Speed Queen dryer. Designed for seamless operation, this 3-cycle timer operates on 240V, ensuring optimal performance and efficiency. Crafted by Speed Queen, a trusted name in laundry solutions, this circuit board and overlay are compatible with select models from Speed Queen, Amana, and Alliance, making it a versatile choice for various dryer configurations.
With precise timing controls, this part guarantees that your laundry cycles run smoothly, helping you achieve perfectly dried clothes every time. Whether you're tackling a small load or a hefty batch, this timer enhances your dryer’s functionality. Invest in this reliable replacement part to keep your appliance running at its best and restore your dryer to peak condition. Ensure your laundry day is hassle-free with this essential part.
Weight : 0.25 lbs
Package Dimension : 4.69 x 2.83 x 2.64
Please Verify Your Purchase to Submit a Review
DIY Instructions on Replacing a Speed Queen D517559 TIMER, DRYER 3 CYCLE 240V 60HZ
1. Shut off the power to your dryer at the circuit breaker box. Unplug the dryer by pulling the plug out of its outlet.
2. Take off the front panel of the dryer to access the motor and electrical connections inside the appliance. This can be done by lifting the top off of the dryer and removing the panel screws with a Phillips head screwdriver.
3. Disconnect the wires that are connected to the timer. These wires should be labeled with their destination or a color-coding system should be used to ensure that each wire is reconnected to the exact same port on the new timer.
4. Disconnect the knob from the timer and unscrew the screws that hold it in place. Pull the timer out of the control panel.
5. Insert the new timer into the control panel, making sure that the grooves located around the base of the timer fit into the slots in the control panel. Secure the timer with the screws that were removed from the old timer.
6. Reconnect the wires to the appropriate ports that are labeled on the new timer.
7. Place the knob on the timer and turn it clockwise until it stops. This engages the timer and sets it to the dry cycle.
8. Reattach the front panel of the dryer and replace the screws to secure it in place.
9. Plug the dryer back into its outlet and turn the power back on at the circuit breaker box.
Please keep in mind, these instructions are for general guidance and should always be used in conjunction with the manufacturer's manual, if available.
No more associated models for this part.


