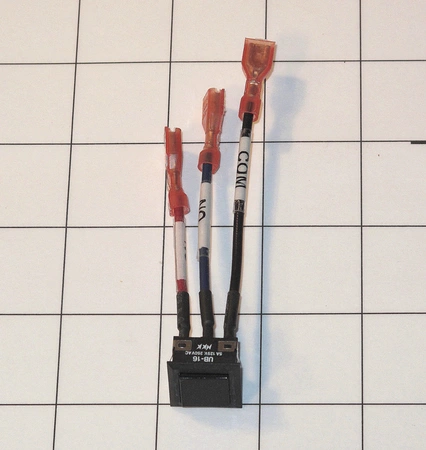
DE81-09306A Samsung Service Switch Harness

Maintain your Samsung range with this essential service switch harness, designed specifically for seamless compatibility with various Samsung appliances. Crafted to ensure optimal performance, this wire and receptacle connector guarantees reliable connections and efficient operation.
This high-quality part is a perfect replacement for worn or damaged components, ensuring your range functions flawlessly. Its durable design withstands the everyday demands of your kitchen, allowing you to cook with confidence. Ideal for DIY enthusiasts and professional technicians alike, installation is straightforward, making it a valuable addition to your repair toolkit.
Keep your Samsung range running smoothly with this dependable service switch harness. Trust in a product that meets the high standards of Samsung, ensuring your appliance remains a valuable asset in your home.
Weight : 0.15 lbs
Package Dimension : 7.60 x 2.01 x 1.38
Please Verify Your Purchase to Submit a Review
Please note: We use this information only to confirm your purchase, it won’t be published.
Replacing the Samsung DE81-09306A SVC-HARNESS SWITCH
1. Unplug all power cords from the power outlet.
2. Remove the cabinet from the wall if applicable.
3. Carefully remove the old switch from the small plastic spacer, this is typically located at the bottom of the refrigerator. You may need a flathead screwdriver to assist with the removal of the switch.
4. Gently pull out the wires and disconnect them from the old switch. Be sure to note the configuration of the different colored wires.
5. Take the new switch and connect the wires in the same manner as they were connected to the old switch.
6. Place the new switch into the plastic spacer ensuring that it sits securely before screwing it down tightly.
7. Reattach the cabinet, plug the power cords back in and power on the fridge.
8. Test the new switch by adjusting the temperature settings and making sure the fridge is working correctly.
Please keep in mind, these instructions are for general guidance and should always be used in conjunction with the manufacturer's manual, if available.
No more associated models for this part.


