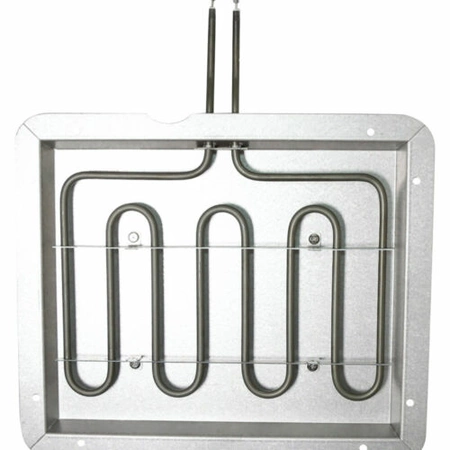
DE81-07354A Samsung Range Broiler Assembly

Maintain your cooking experience with this high-quality heating element designed for Samsung ranges. Crafted for durability and performance, this broiler assembly ensures optimal heat distribution for perfect browning and crisping of your favorite dishes. Easy to install, it is a direct replacement for your worn or malfunctioning broiler, restoring your oven's functionality in no time.
Crafted specifically for Samsung appliances, this part guarantees compatibility and seamless operation. Whether you’re broiling meats, baking casseroles, or toasting bread, this heating element is essential for achieving culinary perfection. Invest in this essential component to keep your kitchen running smoothly and elevate your home cooking to new heights. Make your cooking effortless and enjoyable today!
Weight : 4.68 lbs
Package Dimension : 19.57 x 15.94 x 2.09
Product Details
Reviews
Replaces Parts
Installation Instructions
Compatible Models
Compatible Brands
Maintain your cooking experience with this high-quality heating element designed for Samsung ranges. Crafted for durability and performance, this broiler assembly ensures optimal heat distribution for perfect browning and crisping of your favorite dishes. Easy to install, it is a direct replacement for your worn or malfunctioning broiler, restoring your oven's functionality in no time.
Crafted specifically for Samsung appliances, this part guarantees compatibility and seamless operation. Whether you’re broiling meats, baking casseroles, or toasting bread, this heating element is essential for achieving culinary perfection. Invest in this essential component to keep your kitchen running smoothly and elevate your home cooking to new heights. Make your cooking effortless and enjoyable today!
Weight : 4.68 lbs
Package Dimension : 19.57 x 15.94 x 2.09
Please Verify Your Purchase to Submit a Review
Please note: We use this information only to confirm your purchase, it won’t be published.
The following parts are replaced by this product
- 700713
DIY Guide to Replacing DE81-07354A Samsung Range Broiler Assembly
1. Disconnect power to the range from the main outlet.
2. Open the oven door and remove the two screws that secure the access cover to the inside wall of the oven.
3. Remove the access cover to gain access to the broiler assembly.
4. Carefully pull the broiler assembly out of the oven, taking care not to damage any wires or components on the way.
5. Check for any disconnected wires or components that may need to be reattached to the new assembly.
6. Remove the screws that secure the old broiler assembly to the back wall of the oven.
7. Remove the old assembly and discard it.
8. Unpack the new DE81-07354A Samsung Range Broiler Assembly.
9. Connect any disconnected wires or components from the old assembly to the new one.
10. Reattach the broiler assembly to the back wall of the oven with the screws supplied.
11. Secure the access cover back into place, using the two screws removed earlier.
12. Reconnect the power to the range and test to ensure it is working correctly.
Please keep in mind, these instructions are for general guidance and should always be used in conjunction with the manufacturer's manual, if available.
No more associated models for this part.


