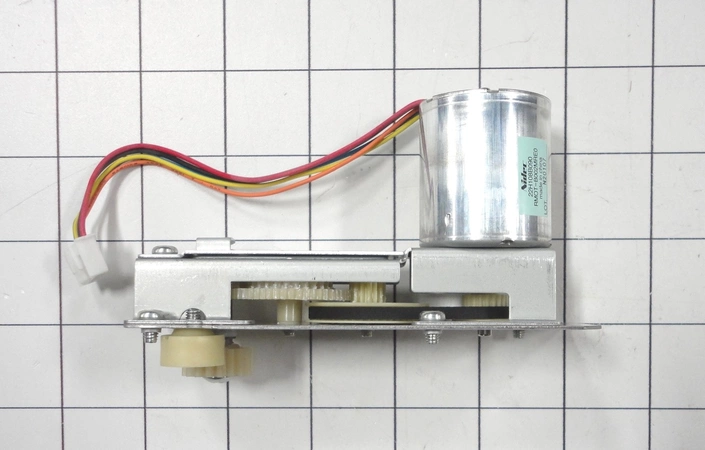
DE81-06213A Samsung Auto Drawer Gear Assembly

The Samsung DE81-06213A SVC-AUTO DRWR GEAR ASSY. Contact us for further questions as well as any other appliance parts needs!
Product Details
Reviews
Replaces Parts
Installation Instructions
Compatible Models
Compatible Brands
The Samsung DE81-06213A SVC-AUTO DRWR GEAR ASSY. Contact us for further questions as well as any other appliance parts needs!
Please Verify Your Purchase to Submit a Review
Please note: We use this information only to confirm your purchase, it won’t be published.
The following parts are replaced by this product
- 106021
DIY Instructions for Replacing the Samsung DE81-06213A SVC-AUTO DRWR GEAR ASSY
1. Before you start, unplug your machine from the power source and wear protective gloves and safety glasses.
2. Open the drawer of your machine and identify the Samsung DE81-06213A SVC-AUTO DRWR GEAR ASSY.
3. Carefully remove any screws or holding clips that are affixing the gear to the drawer.
4. Take the new Samsung DE81-06213A SVC-AUTO DRWR GEAR ASSY and begin to install it into the drawer in the same manner as the original one was affixed.
5. Tighten the screws or clips to secure the assembly in place.
6. Test the drawer operation by opening and closing it to make sure the new gear is working properly.
7. If everything is functioning, close the drawer and re-connect your washing machine to the power source.
Please keep in mind, these instructions are for general guidance and should always be used in conjunction with the manufacturer's manual, if available.
No more associated models for this part.


