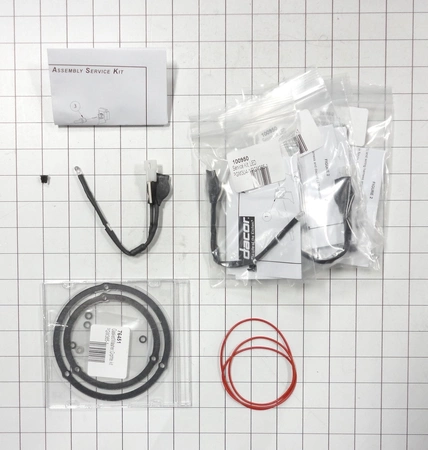
DE81-03508A Samsung LED Cooktop Service Kit

LED service kit works with some Dacor models of range / cooktops.
Product Details
Reviews
Replaces Parts
Installation Instructions
Compatible Models
Compatible Brands
LED service kit works with some Dacor models of range / cooktops.
Please Verify Your Purchase to Submit a Review
The following parts are replaced by this product
- 701613
DIY Instructions for Replacing a Samsung DE81-03508A SVC-LED SERVICE KIT COOKTOP
1. Safety First: Before beginning any DIY project, it’s important to make sure you have the necessary tools and know the proper safety precautions needed to complete the task. Be sure to turn off all power sources, gas valves, and electrical switches. Wear protective gloves and eye protection. Use caution when wiring connecting switch frames.
2. Locate the appropriate installation manual: Check the manufacturer’s website or user manual for specific instructions related to your replacement cooktop.
3. Gather the necessary tools and materials: You will need pliers, screwdrivers, wire, and a suitable sized wrench or adjustable wrench. You will also need the DE81-03508A SVC-LED SERVICE KIT.
4. Disconnect the old cooktop: Unplug the cooktop and disconnect all connectors. Remove the screws securing the cooktop and lift it up, freeing the cooktop from the countertop and carefully put it aside.
5. Install the new cooktop: Place the new cooktop in the designated area, lining up the drill holes. Secure it with the screws provided and attach the connectors.
6. Install the SVC-LED service kit: Follow the instructions in the kit to install the LED service kit. Be sure to connect the ground conductor and the main phase wire to the terminals.
7. Test the New Cooktop: Once everything is connected and properly installed, turn on the power and test the cooktop to make sure it’s operating correctly.
With these simple steps, you can easily replace a Samsung DE81-03508A SVC-LED SERVICE KIT COOKTOP without needing to call a professional. Always exercise caution and use the necessary safety measures when completing DIY projects. Good luck!
Please keep in mind, these instructions are for general guidance and should always be used in conjunction with the manufacturer's manual, if available.
No more associated models for this part.


